


Modes of Operation
The API is available in two modes that can be accessed by sending requests to different base URLs. Each API client secret you are granted can only be used with a single mode. For example: an API client ID and secret granted to access the Sandbox Mode can only be used in that mode.
| Mode | Host | Description |
|---|---|---|
| Sandbox | https://sandbox.smileapi.io/v1 | Use Sandbox mode to build and test your integration. In this mode, you must use test credentials to authenticate with the employment data providers. All API endpoints will return mock data and no actual user data is returned. Sandbox mode is instantly turned on for all users. |
| Production | https://open.smileapi.io/v1 | Production mode is used to go live with your integration. Your end-users will use their login credentials to authenticate with their employment data providers. API endpoints return real data and in this mode, all API calls are billable. Production mode access is subject to approval. |
Upon signup, you will have instant and free access to test on our Sandbox environment. If you need Production environment access, contact us.
Testing in Sandbox Mode
Smile provides a Sandbox mode for our production environment to allow you to test your integration with sample data.
To use the Sandbox, you can use the following example credentials:
| User Name | Full Name | Mobile Phone | Password | Verification Code | SS Number | |
|---|---|---|---|---|---|---|
| George | George Palomero Jr. | [email protected] | (+63) 9559991234 | 123456 | 1234 | 3300000008 |
| Ryan | Ryan Lestari | [email protected] | (+62) 8119994321 | 654321 | 1234 | N/A |
| Christina | Christina Tan | [email protected] | (+65) 99996789 | YGUS1 | 1234 | N/A |
| Anisha | Anisha Bhatia | [email protected] | (+91) 9511198765 | 123456 | 1234 | N/A |
Archives in Sandbox Mode return only specific payslips. To test Archives while in Sandbox Mode, you may download the sample payslips within the Developer Portal and upload it through the Wink Widget or through the API. Other files uploaded during Sandbox mode will return errors.

Authentication
The Smile Open API uses HTTP Basic Auth.
Basic authentication is a simple authentication scheme built into the HTTP protocol. To use it, send your HTTP requests with an Authorization header that contains the word Basic followed by a space and a base64-encoded string API Key:API Secret.
These credentials are associated with your Smile tenant account and can be used to access the Smile Network. To retrieve your credentials, simply sign up on our Developer Portal and access your API Keys in the developer portal.
ExampleAuthorization: Basic ZGVtbzpwQDU1dzByZA==
To retrieve data from our API, you should include in your Authorization header the word Basic, followed by a space and a base64-encoded (non-encrypted) string apikey:apisecret or Authorization: Basic {base64 encoded string}.
Your API Key and Secret can be found by logging into the Developer Portal under the API Keys section.
Upon signup, you will have instant and free access to test on our Sandbox environment. If you need Production environment access, contact us.
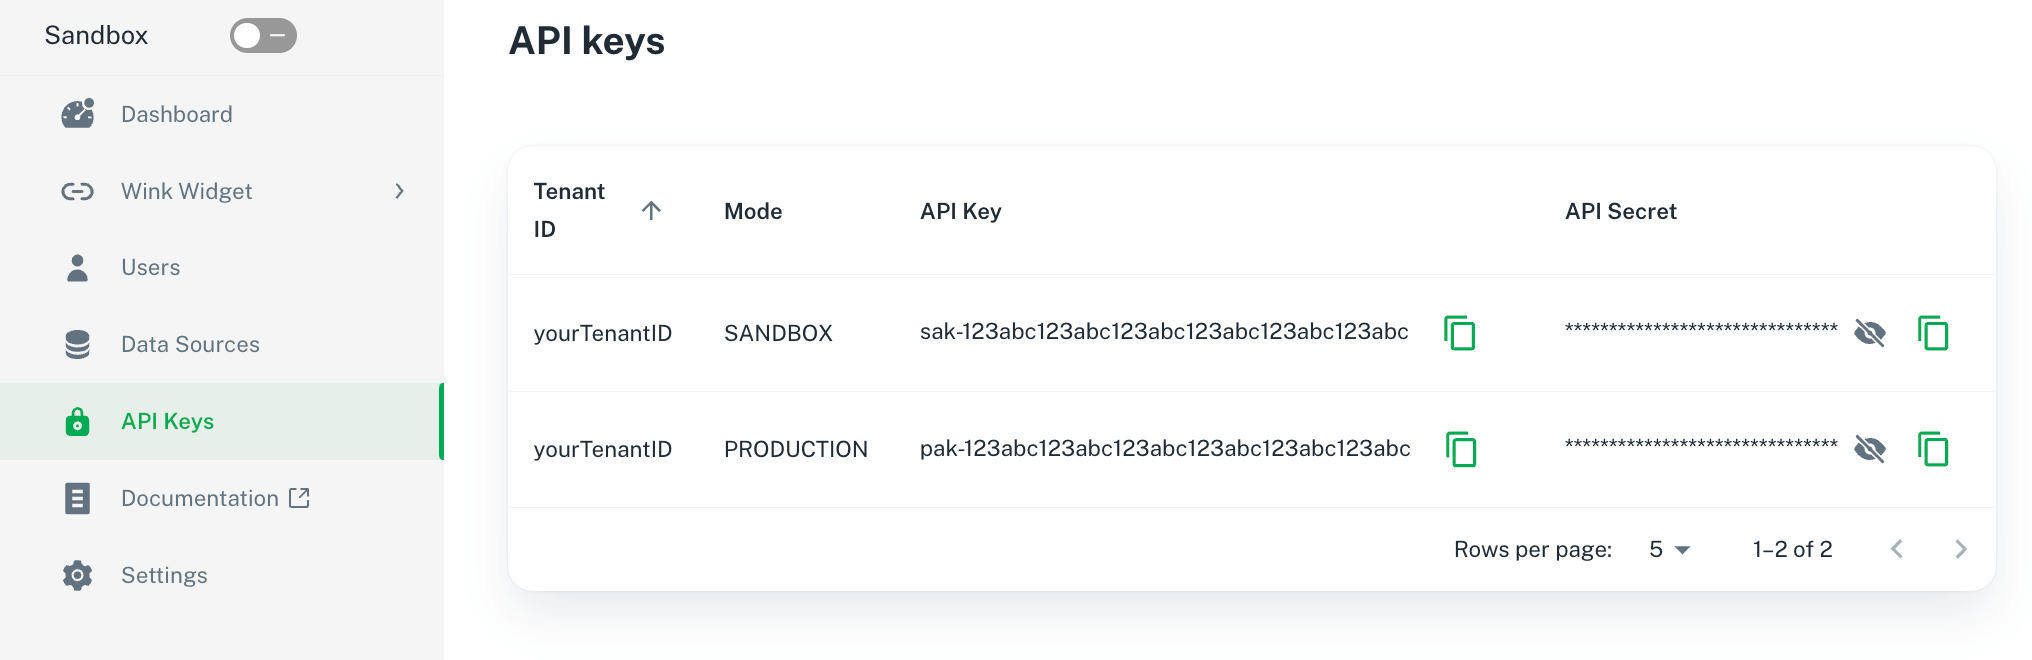
You may click on the Copy icon next to your API Key and Secret to easily copy it to your computer clipboard.

Versioning
The version is included in the URI Path. So for example it will look like: https://open.smileapi.io/v1/
The versioning convention we use is the 1.2.3 format, where 1 is the major version, 2 is the minor version, and 3 is the patch update:
- Major version: The version used in the URI, and denotes breaking changes to the API. While we try to keep changes backward compatible, there may be occasions where we will need to introduce changes that might change existing behavior or functionality. These changes will be implemented in versions of the API accessible under a differnet URI (eg
https://open.smileapi.io/v2/). You can continue to use the existing URI to avoid breaking existing integrations, but in order to take advantage of new features, you will have to update your application to point to the new version and URI. - Minor and Patch versions: These are transparent to the client and we use this internally for backward compatible updates. You do not need to update your integration when we release minor updates or patches. We will communicate these via via our change logs and email notifications, so you are updated about all of these changes.

Error Messages
| HTTP Status Code | Status Description | Smile Code | Message |
|---|---|---|---|
| 400 - Bad Request | The request could not be understood by the server due to incorrect syntax. The client SHOULD NOT repeat the request without modifications. | INVALID_CREDENTIALS | The credentials you provided are incorrect. |
| 400 - Bad Request | The request could not be understood by the server due to incorrect syntax. The client SHOULD NOT repeat the request without modifications. | INVALID_PARAMETERS | Missing or invalid parameters were sent in your request. |
| 401 - Unauthorized | Indicates that the request requires user authentication information. The client MAY repeat the request with a suitable Authorization header field | INVALID_TOKEN | The token you provided is invalid or has expired. |
| 403 - Forbidden | Unauthorized request. The client does not have access rights to the content. Unlike 401, the client’s identity is known to the server. | UNAUTHORIZED_ACCESS | You do not have permission to access this resource. |
| 404 - Not Found | The server can not find the requested resource. | MISSING_RESOURCE | The resource you provided cannot be found or is unavailable. |
| 415 - Unsupported Media Type | The payload format is either not defined or is in an unsupported format. | UNSUPPORTED_TYPE | Please specify a valid content type for your request. |
| 429 - Too Many Requests | Too many requests sent in a given amount of time | REQUEST_LIMIT_EXCEEDED | You have exceeded your rate limit for this resource. Please try again later or contact support. |
| 500 - Internal Server Error | The server encountered an unexpected condition which prevented it from fulfilling the request. | SERVER_ERROR | Our system is currently experiencing issues. Please try again later or contact support. |
| 501 - Not Implemented | The HTTP method is not supported by the server and cannot be handled. | UNSUPPORTED_METHOD | The HTTP method you used is not supported for this resource. |
| 503 - Service Unavailable | The server is not ready to handle the request. | SERVER_UNAVAILABLE | The server is not available to handle the request. It may be down or under maintenance. Please try again later or contact support. |
| 504 - Gateway Timeout | The server cannot give a response in time. | TIME_LIMIT_EXCEEDED | The server was not able to give a response in the allotted time. Please try again or contact support. |

Body of Results
All responses are encoded in JSON and return the following attributes:
- code
- message
- requestId
- data
If the response is a single object, the value of the data attribute is that object. For example, the Get Identity endpoint will return the following, with the attribute data returning a single Identity object:
{
    "code": "OK",
    "message": "Success!",
    "requestId": "58be58d8-fdc9-4834-a5d2-711fb7386a0c",
    "data": {
      "id": "i-123abc456def789abc123def456abc78",
      "fullName": "George Cimafranca Palomero, Jr",
      "firstName": "George",
      "middleName": "Cimafranca",
      "lastName": "Palomero",
      "suffix": "Jr",
      "gender": "Male",
      "dob": "1970-08-24",
      "maritalStatus": "Married",
      "countryResidence": "PH",
      "citizenship": "Citizen",
      "photoUrl": "https://cdn.smileapi.io/image/avatar/v20211115191600/george.jpg",
      "referenceId": null,
      "profileUrl": null,
      "emails": [
        {
          "address": "[email protected]",
          "type": "Primary"
        }
      ],
      "phones": [
        {
          "number": "+639559991234",
          "type": "Mobile"
        }
      ],
      "socialProfiles": [
        {
          "socialUrl": "https://www.facebook.com/gpalomero1234",
          "type": "Facebook"
        }
      ],
      "addresses": [
        {
          "fullAddress": "12 Maybunga St, Barangay Paraiso, Pasig City, NCR, 1600, PH",
          "line1": "12 Maybunga St",
          "line2": "Barangay Paraiso",
          "city": "Pasig City",
          "region": "NCR",
          "zip": "1600",
          "country": "PH",
          "latitude": "14.573454",
          "longitude": "121.085042",
          "type": "Primary"
        }
      ],
      "metadata": {
        "createdAt": "2022-08-19T07:29:08Z",
        "itemCreatedAt": "2022-08-24T05:24:37Z",
        "sourceId": "a-123abc456def789abc123def456abc78",
        "sourceType": "ACCOUNT",
        "userId": "tenantId-123abc456def789abc123def456abc78",
        "providerId": "abccorp"
      }
    }
}
If the result is related to data retrieved from a user's account, a metadata object is also returned with more information about the response such as:
- createdAt
- itemCreatedAt
- sourceId
- sourceType
- userId
- providerId
If the response is a list or collection, the value of the data attribute is an array of objects. For example, the List Transactions endpoint will return a collection of Transactions:
{
    "code": "OK",
    "message": "Success!",
    "requestId": "508a2074-9229-4d59-b716-bb6b4221e196",
    "data": {
        "nextCursor": null,
        "items": [
            {
                "id": "t-f4b8293631c84e759d30afebb7d98678",
                "date": "2021-08-06",
                "description": "Order revenue",
                "currency": "PHP",
                "amount": 222.0000,
                "referenceId": "Order ID-945485798532",
                "metadata": {
                    "createdAt": "2022-02-22T05:26:09Z",
                    "itemCreatedAt": "2022-02-22T05:36:09Z",
                    "sourceId": "0e0e97100eec49e8b954e9e419d527fe",
                    "sourceType": "ACCOUNT",
                    "userId": "smilejan-329789936388493f831ad0edd1f8bc8c",
                    "providerId": "upwork"
                }
            },
            {
                "id": "t-281ad47efdc043e796e128ee5bdf50c3",
                "date": "2021-08-07",
                "description": "Order revenue",
                "currency": "PHP",
                "amount": 114.0000,
                "referenceId": "Order ID-023485780332",
                "metadata": {
                    "createdAt": "2022-02-22T05:26:09Z",
                    "itemCreatedAt": "2022-02-22T05:36:09Z",
                    "sourceId": "0e0e97100eec49e8b954e9e419d527fe",
                    "sourceType": "ACCOUNT",
                    "userId": "smilejan-329789936388493f831ad0edd1f8bc8c",
                    "providerId": "upwork"
                }
            },
            {
                "id": "t-6853edd863514eae98b18abf56764fc3",
                "date": "2021-08-08",
                "description": "Platform fee",
                "currency": "PHP",
                "amount": -25.5000,
                "referenceId": "Order ID-934585780080",
                "metadata": {
                    "createdAt": "2022-02-22T05:26:09Z",
                    "itemCreatedAt": "2022-02-22T05:36:09Z",
                    "sourceId": "0e0e97100eec49e8b954e9e419d527fe",
                    "sourceType": "ACCOUNT",
                    "userId": "smilejan-329789936388493f831ad0edd1f8bc8c",
                    "providerId": "upwork"
                }
            },
            {
                "id": "t-9409019eb2f141f898e73775be4c6600",
                "date": "2021-04-04",
                "description": "Order revenue",
                "currency": "PHP",
                "amount": 220.0000,
                "referenceId": "Order ID-934587514002",
                "metadata": {
                    "createdAt": "2022-02-22T05:26:09Z",
                    "itemCreatedAt": "2022-02-22T05:36:09Z",
                    "sourceId": "0e0e97100eec49e8b954e9e419d527fe",
                    "sourceType": "ACCOUNT",
                    "userId": "smilejan-329789936388493f831ad0edd1f8bc8c",
                    "providerId": "upwork"
                }
            },
            {
                "id": "t-a402ac196f404ab5bf1d148c5685624f",
                "date": "2021-08-09",
                "description": "Platform fee",
                "currency": "PHP",
                "amount": -20.0000,
                "referenceId": "Order ID-156987512999",
                "metadata": {
                    "createdAt": "2022-02-22T05:26:09Z",
                    "itemCreatedAt": "2022-02-22T05:36:09Z",
                    "sourceId": "0e0e97100eec49e8b954e9e419d527fe",
                    "sourceType": "ACCOUNT",
                    "userId": "smilejan-329789936388493f831ad0edd1f8bc8c",
                    "providerId": "upwork"
                }
            },
            {
                "id": "t-d318e3b6ad7845fda960a5d5add60bcb",
                "date": "2021-08-10",
                "description": "",
                "currency": "PHP",
                "amount": 59.0000,
                "referenceId": "Order ID-664426992012",
                "metadata": {
                    "createdAt": "2022-02-22T05:26:09Z",
                    "itemCreatedAt": "2022-02-22T05:36:09Z",
                    "sourceId": "0e0e97100eec49e8b954e9e419d527fe",
                    "sourceType": "ACCOUNT",
                    "userId": "smilejan-329789936388493f831ad0edd1f8bc8c",
                    "providerId": "upwork"
                }
            },
            {
                "id": "t-b1b8412a02e5482da260c7dbb045f455",
                "date": "2021-08-12",
                "description": "Platform fee",
                "currency": "PHP",
                "amount": -20.0000,
                "referenceId": "Order ID-234728692099",
                "metadata": {
                    "createdAt": "2022-02-22T05:26:09Z",
                    "itemCreatedAt": "2022-02-22T05:36:09Z",
                    "sourceId": "0e0e97100eec49e8b954e9e419d527fe",
                    "sourceType": "ACCOUNT",
                    "userId": "smilejan-329789936388493f831ad0edd1f8bc8c",
                    "providerId": "upwork"
                }
            }
        ]
    }
}
Null Values
Sometimes you might see null as the returned value for a given attribute in the API response. This might happen when:
- The data provider does not have a field for that attribute. For example, it has no fields for 'citizenship' or 'country of residence' related to Identity data.
- In other cases, the field is supported by the data provider, but it is an optional field that is not enabled, or is hidden, or only shows up in certain conditions that are not present at the time the user shared their information. For example, details like their mobile phone or address may not be available if they have not gone through account verification or KYC process in their employment platform.

Conventions and Standards
To help in logging and troubleshooting, we apply some conventions when returning data to you.
| Resource Attribute | Prefix | Example | Description |
|---|---|---|---|
| User ID | tenantId- | smile1234-a5b39dfe76174defb353d7e97a88a85e | each user ID has a prefix related to their tenant ID in our system |
| Identity ID | i- | i-45567e7689be49d5bc052a6e4a3805e6 | Identity related information |
| Transaction ID | t- | t-11de60721342404daa35f60d2875f37b | Transaction related information |
| Ratings ID | r- | r-ff4723f9af5f4dc5b6a22ea27fb3c8a1 | Ratings related information |
| Documents ID | d- | d-ff4723f9af5f4dc5b6a22ea27fb3c8a1 | Documents-related information |
| Employments ID | e- | e-ff4723f9af5f4dc5b6a22ea27fb3c8a1 | Employments-related information |
| Incomes ID | inc- | inc-ff4723f9af5f4dc5b6a22ea27fb3c8a1 | Incomes-related information |
| Estimated Incomes ID | einc- | einc-ff4723f9af5f4dc5b6a22ea27fb3c8a1 | Estimated Incomes-related information |
| Contributions ID | con- | con-ff4723f9af5f4dc5b6a22ea27fb3c8a1 | Incomes-related information |
| Archives ID | archive- | u-ff4723f9af5f4dc5b6a22ea27fb3c8a1 | Uploaded files available as archives |
| Invites ID | iv- | iv-ff4723f9af5f4dc5b6a22ea27fb3c8a1 | Invitations sent out |
| Invite Templates ID | ivt- | ivt-ff4723f9af5f4dc5b6a22ea27fb3c8a1 | Invite Templates created |
To standardize data formats, we use commonly accepted standards to format the data, including:
| Data Types | Format | Example | Standard |
|---|---|---|---|
| date | yyyy-MM-dd | 2021-04-21 | ISO 8601 full date |
| date-time | yyyy-MM-ddTHH:mm:ssZ | 2021-04-21T08:25:05Z | ISO 8601 full time |
| month | yyyy-MM | 2021-04 | ISO 8601 month |
| phone number |
| +65281234567 | E.164 |
| country code | ISO alpha-2 | 'SG' for Singapore | ISO 3166 |
| currency | ISO alpha-3 | 'USD' for US Dollars | ISO 4217 |

List results and Pagination
Resources, or API endpoints, can return a list or a collection of objects. By default we return 10, with a maximum of 150, at a time. You can limit the results by passing a parameter for size. For more information on filtering or limiting results, see below on query parameters.
When Smile returns a collection, we will also return a value called nextCursor. See below for an example:
{
    "code": "OK",
    "message": "Success!",
    "requestId": "17bc5a84-2468-47f6-9d3c-05b5257befa5",
    "data": {
        "nextCursor": "20",
        "items": ["..."]
    }
}
To go to the next page in a collection, simply append the cursor parameter when you query an endpoint, using the nextCursor value returned from your previous query to go to the next page in the collection. See below for more information on cursor and other query parameters.

Query Parameters
API endpoints which return a list or collection of objects can be filtered or limited based on different query parameters. Below are some examples:
| Parameter | Description |
|---|---|
| size | The number of objects you want returned in a collection. See more information above on default values. |
| cursor | Uses the filter values of the previous page to determine the next set of items. See more information above on pagination. |
| userId | Filter the results by the associated userId |
| sourceId | For source-related data, filter the results based on the associated sourceId |
| startDate | For data that has a date attribute, to be able to filter results by date range |
| endDate | For data that has a date attribute, to be able to filter results by date range |
Some resources, however, have unique query parameters associated with them. Check out the documentation in each of the endpoints to find out more.

Rate Limits
Smile limits the amount of API calls that can be made to each endpoint to ensure the stability and availability of the platform. At the moment we only allow clients a maximum of up to 20 requests per second per IP address. This is across all API endpoints. Clients which make too many requests in succession will be given an error with HTTP Status Code 429 or too many requests.
To request a higher limit, please contact [email protected].
NoteRate limits are separate from quota limitations, which are in place to ensure system stability and fair usage. For more information, see Quota Management.