
Design
Plan and design your user verification integration
Customer verification is normally performed during the user registration process. To successfully integrate Smile into your process, we suggest doing so through 3 steps:
- Requirements gathering - explore your use case and what do you want to achieve with Smile data
- Design (this guide) - design your user journey and integration with Smile
- Implementation & Go-live - detailed steps to set up and get the integration launched
Step 1: Design your user journey

There are four aspects to consider when thinking about the user flow:
- Where in the process do you want to leverage Smile?
- Which data providers do you want to route the user through?
- How do you want to on-ramp and off-ramp users?
- How can a user disconnect their account?
Where in the process do you want to leverage Smile?

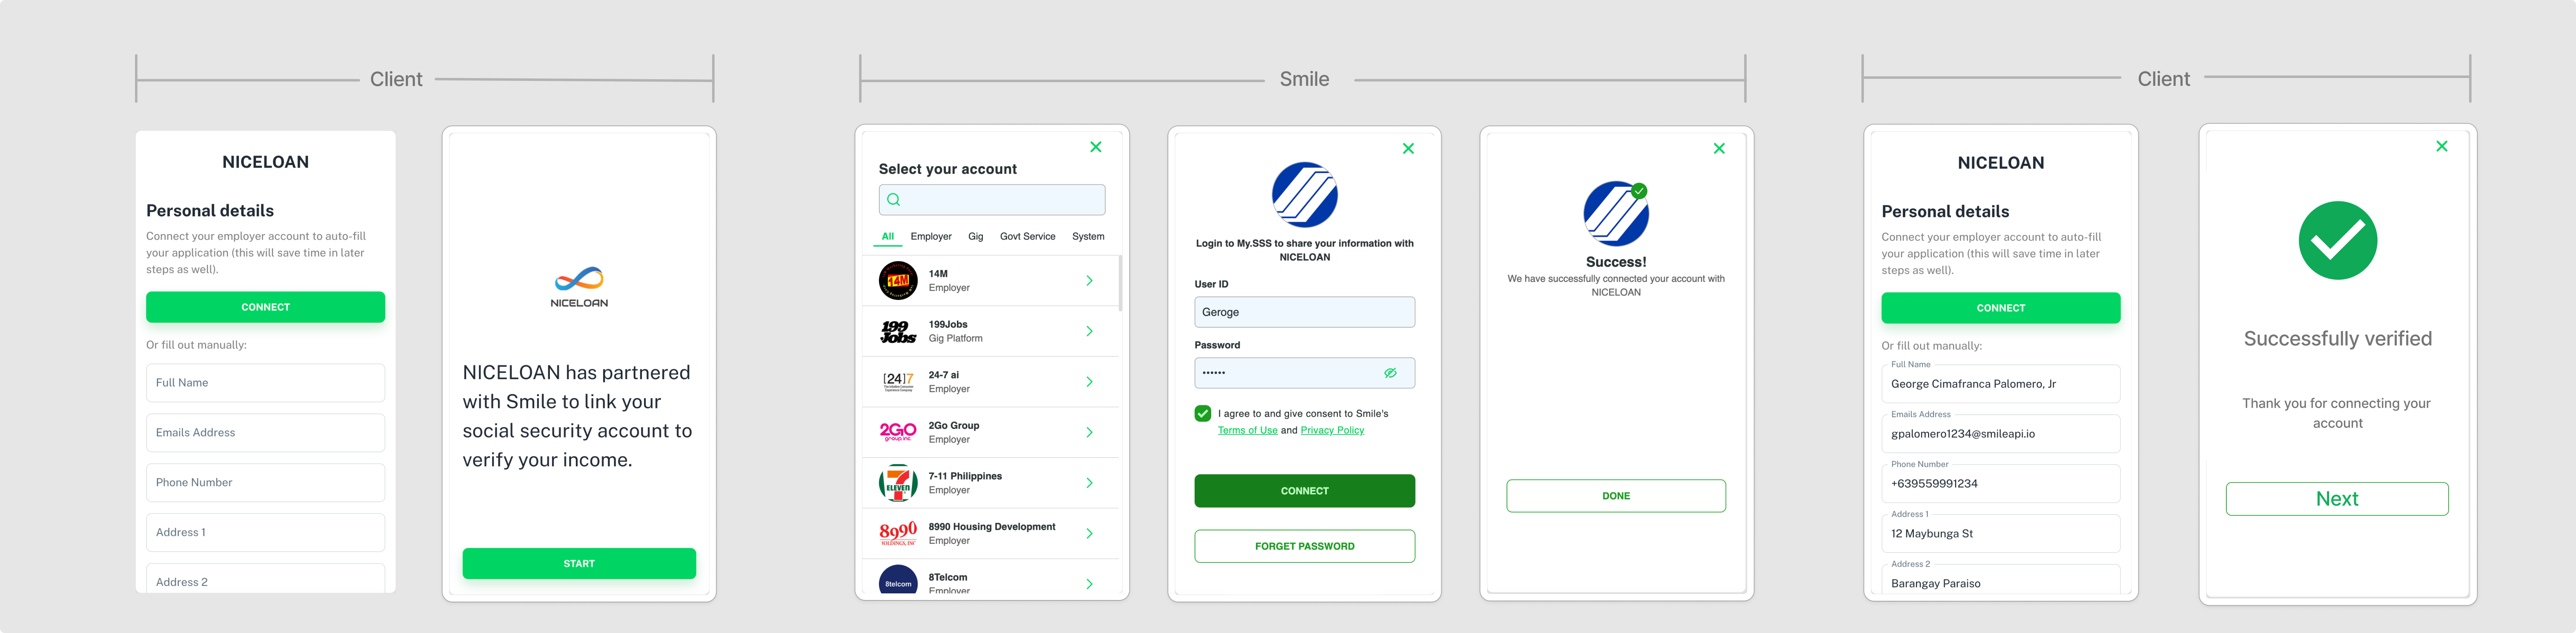
- During pre-qualification or early application - autofill an entire application with personal information
- Underwriting - decision making for an applicant
- Verification - check Certification of Employment, Proof of Billing, etc
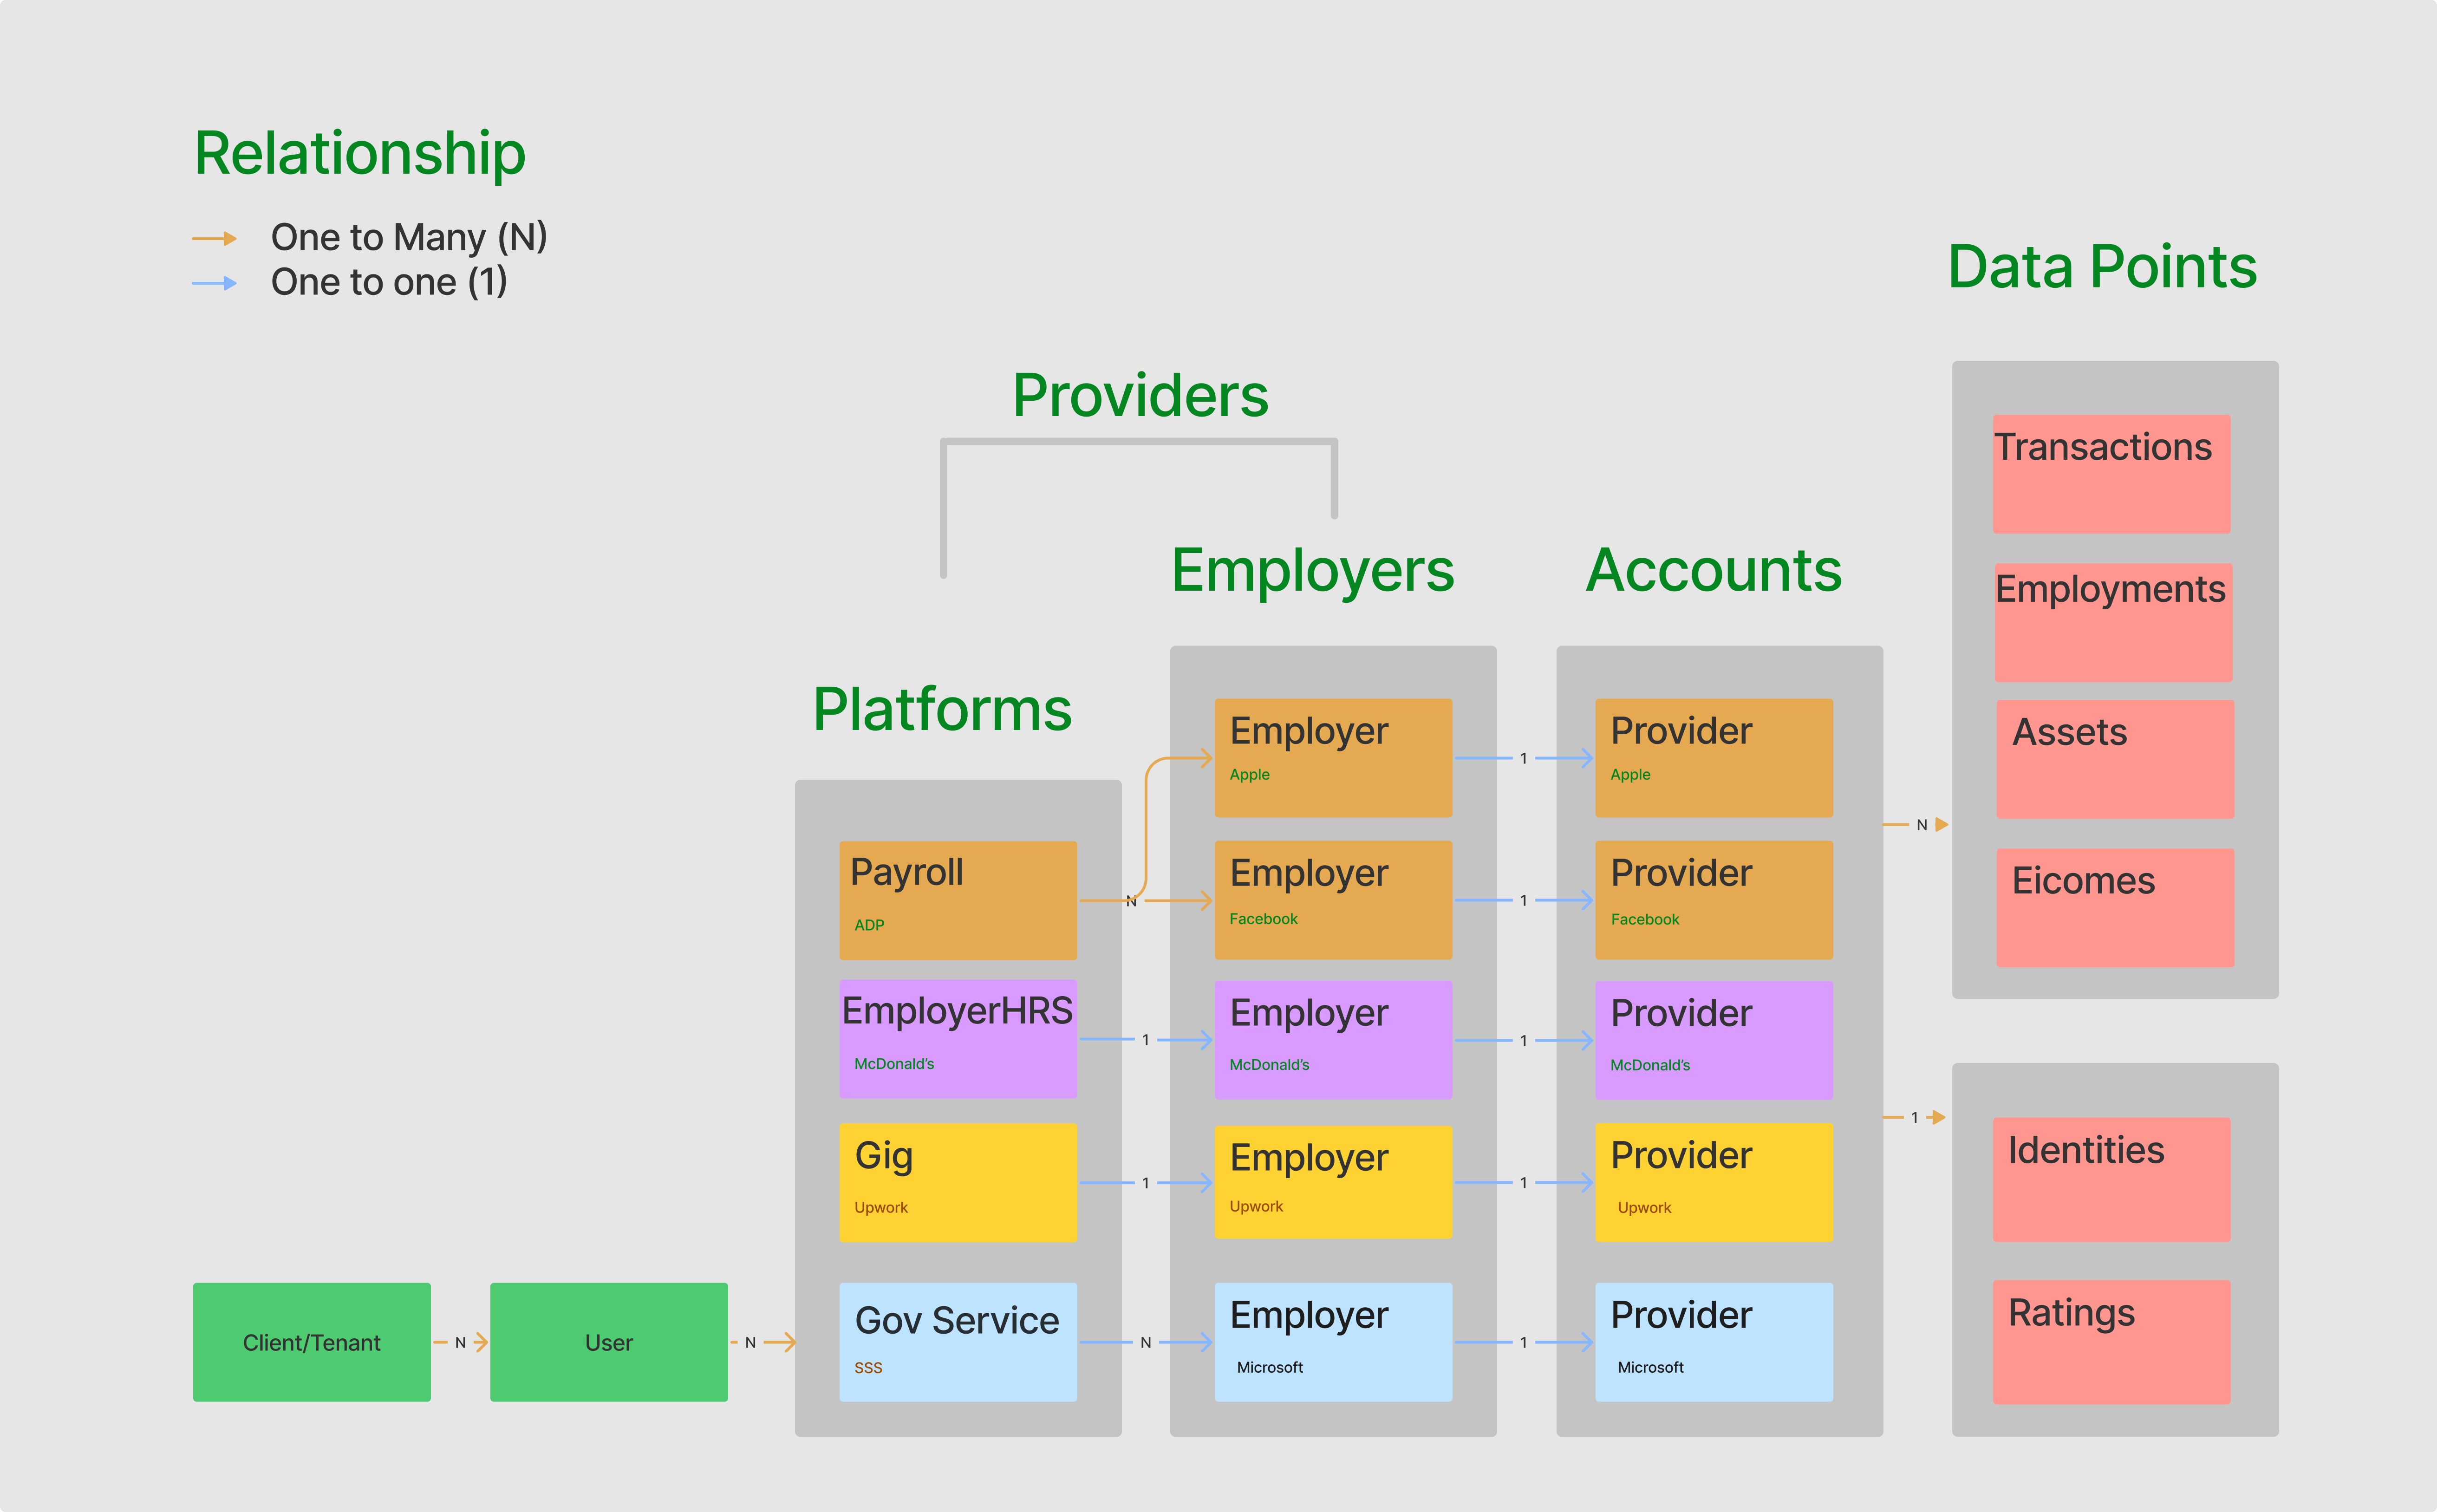
Which data providers do you want to route the user through?
In the Smile Developer Portal, you can find the various data points that each data provider supports, and the data attributes each data point supports.
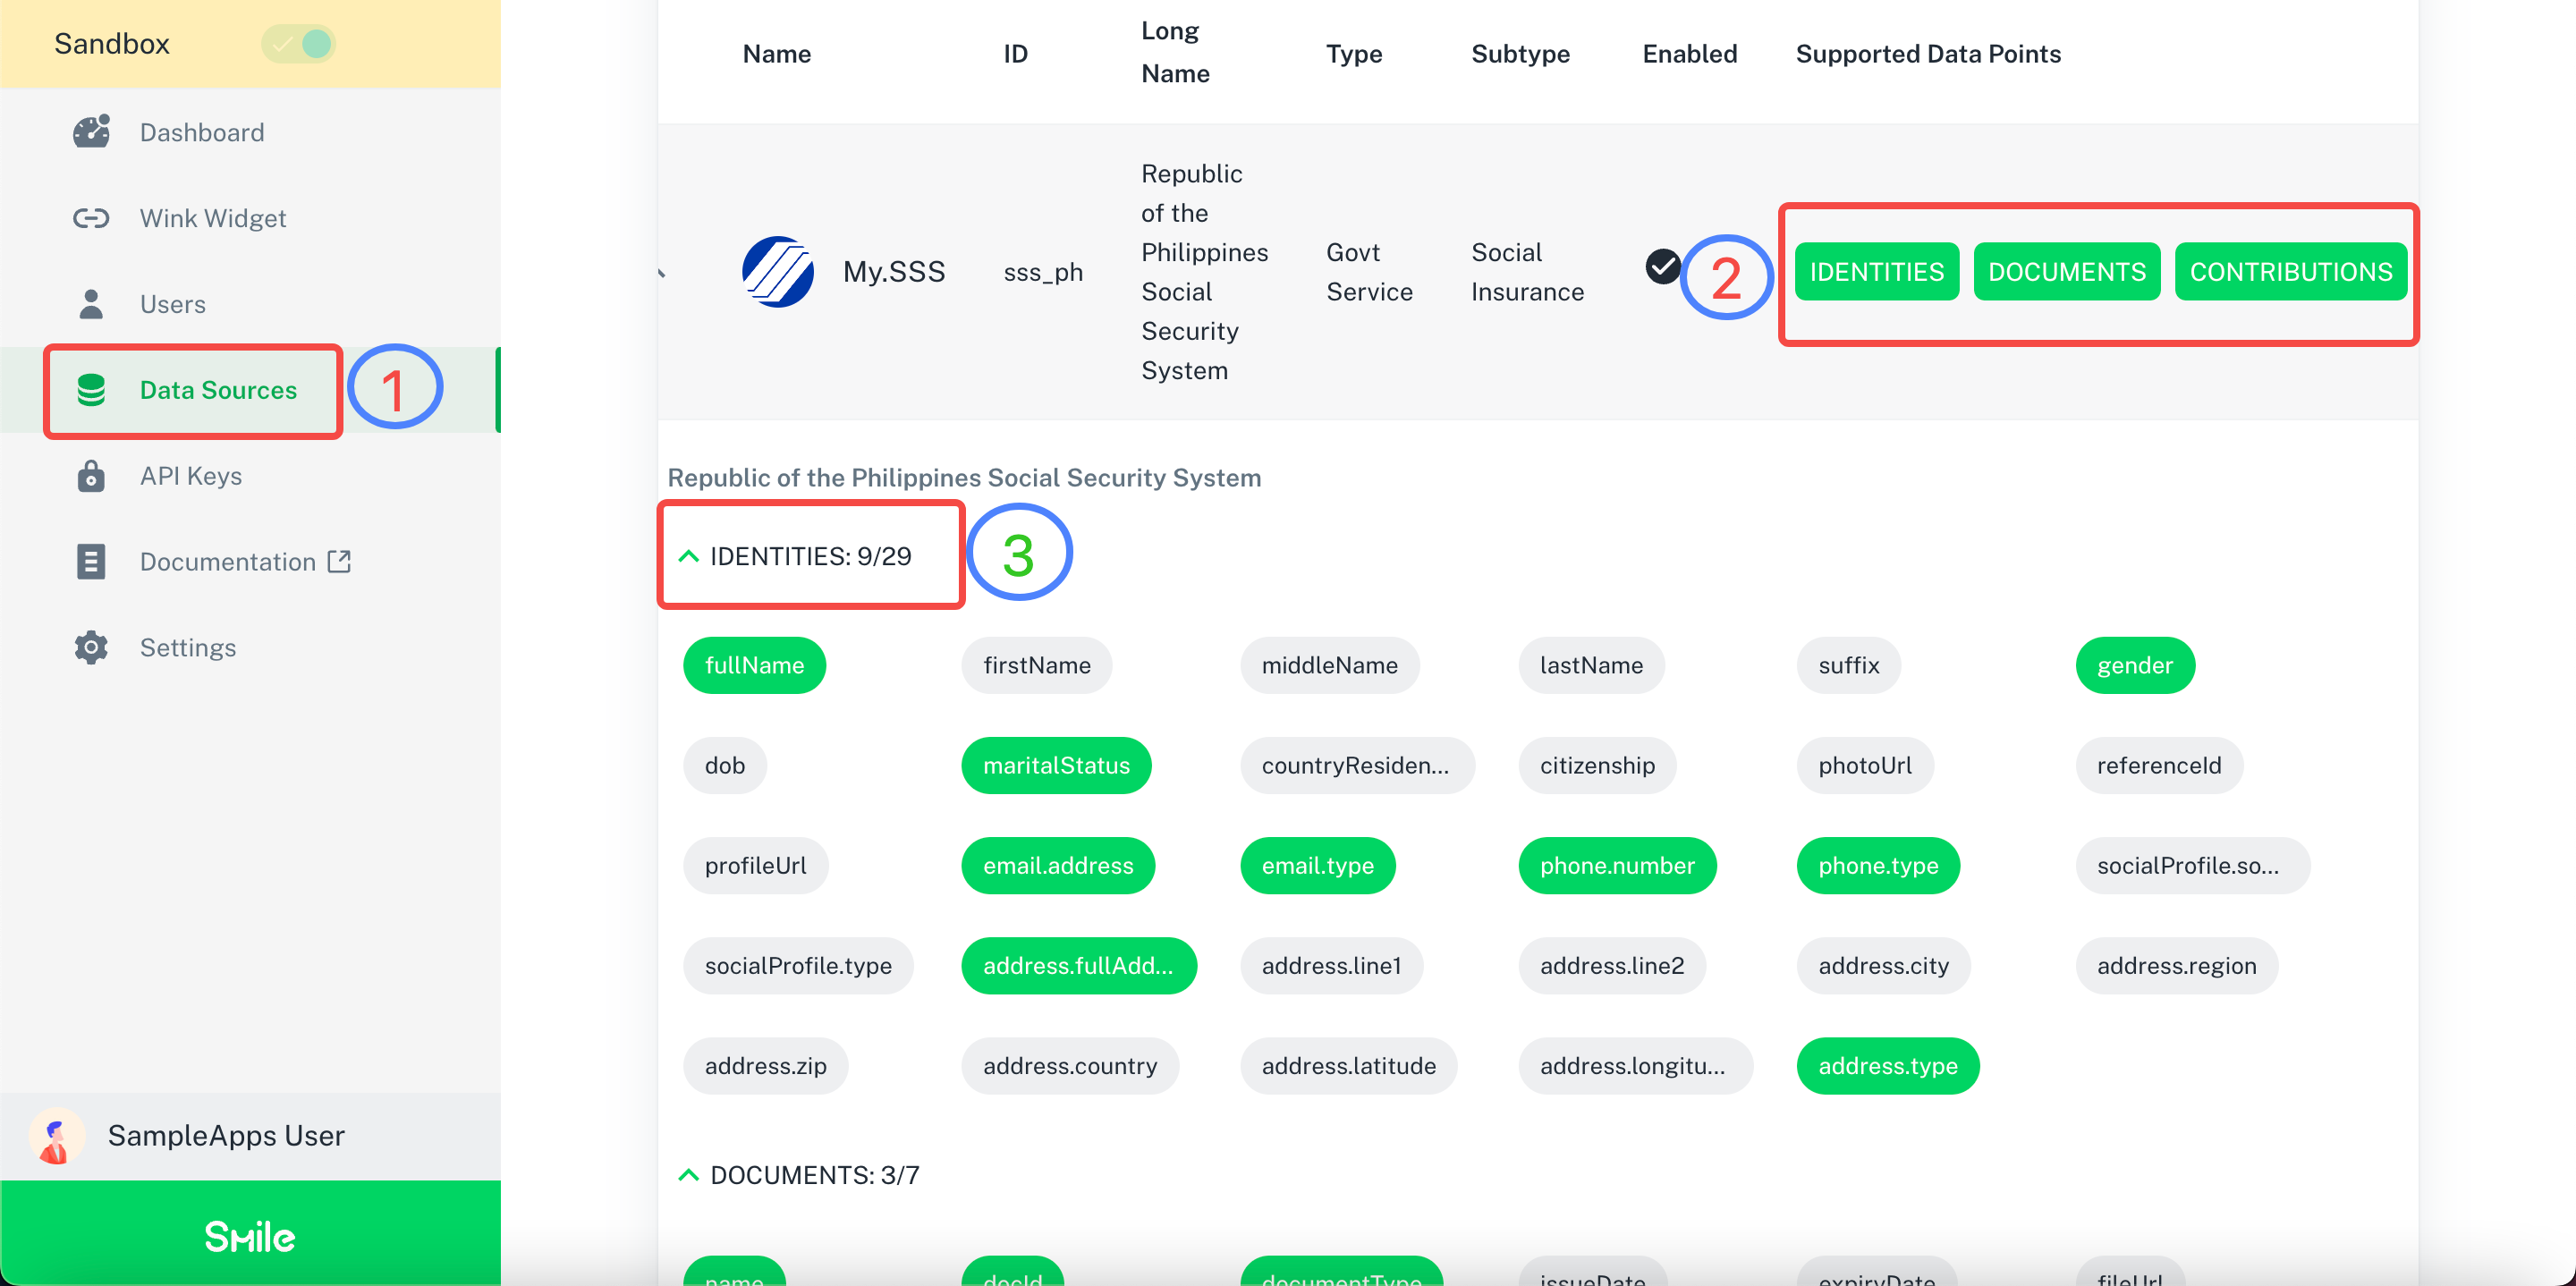
- Navigate to the Data Sources page on the Smile Developer Portal
- View the supported data points for the selected data provider
- View the supported data attributes for the selected data point
The main considerations for choosing providers are:
- Which data providers are being used by your user base?
- What is the data providers' coverage of your user base?
- What data points and attributes do you need that the provider can support?
There are two ways to design your user flow based on your shortlisted providers:
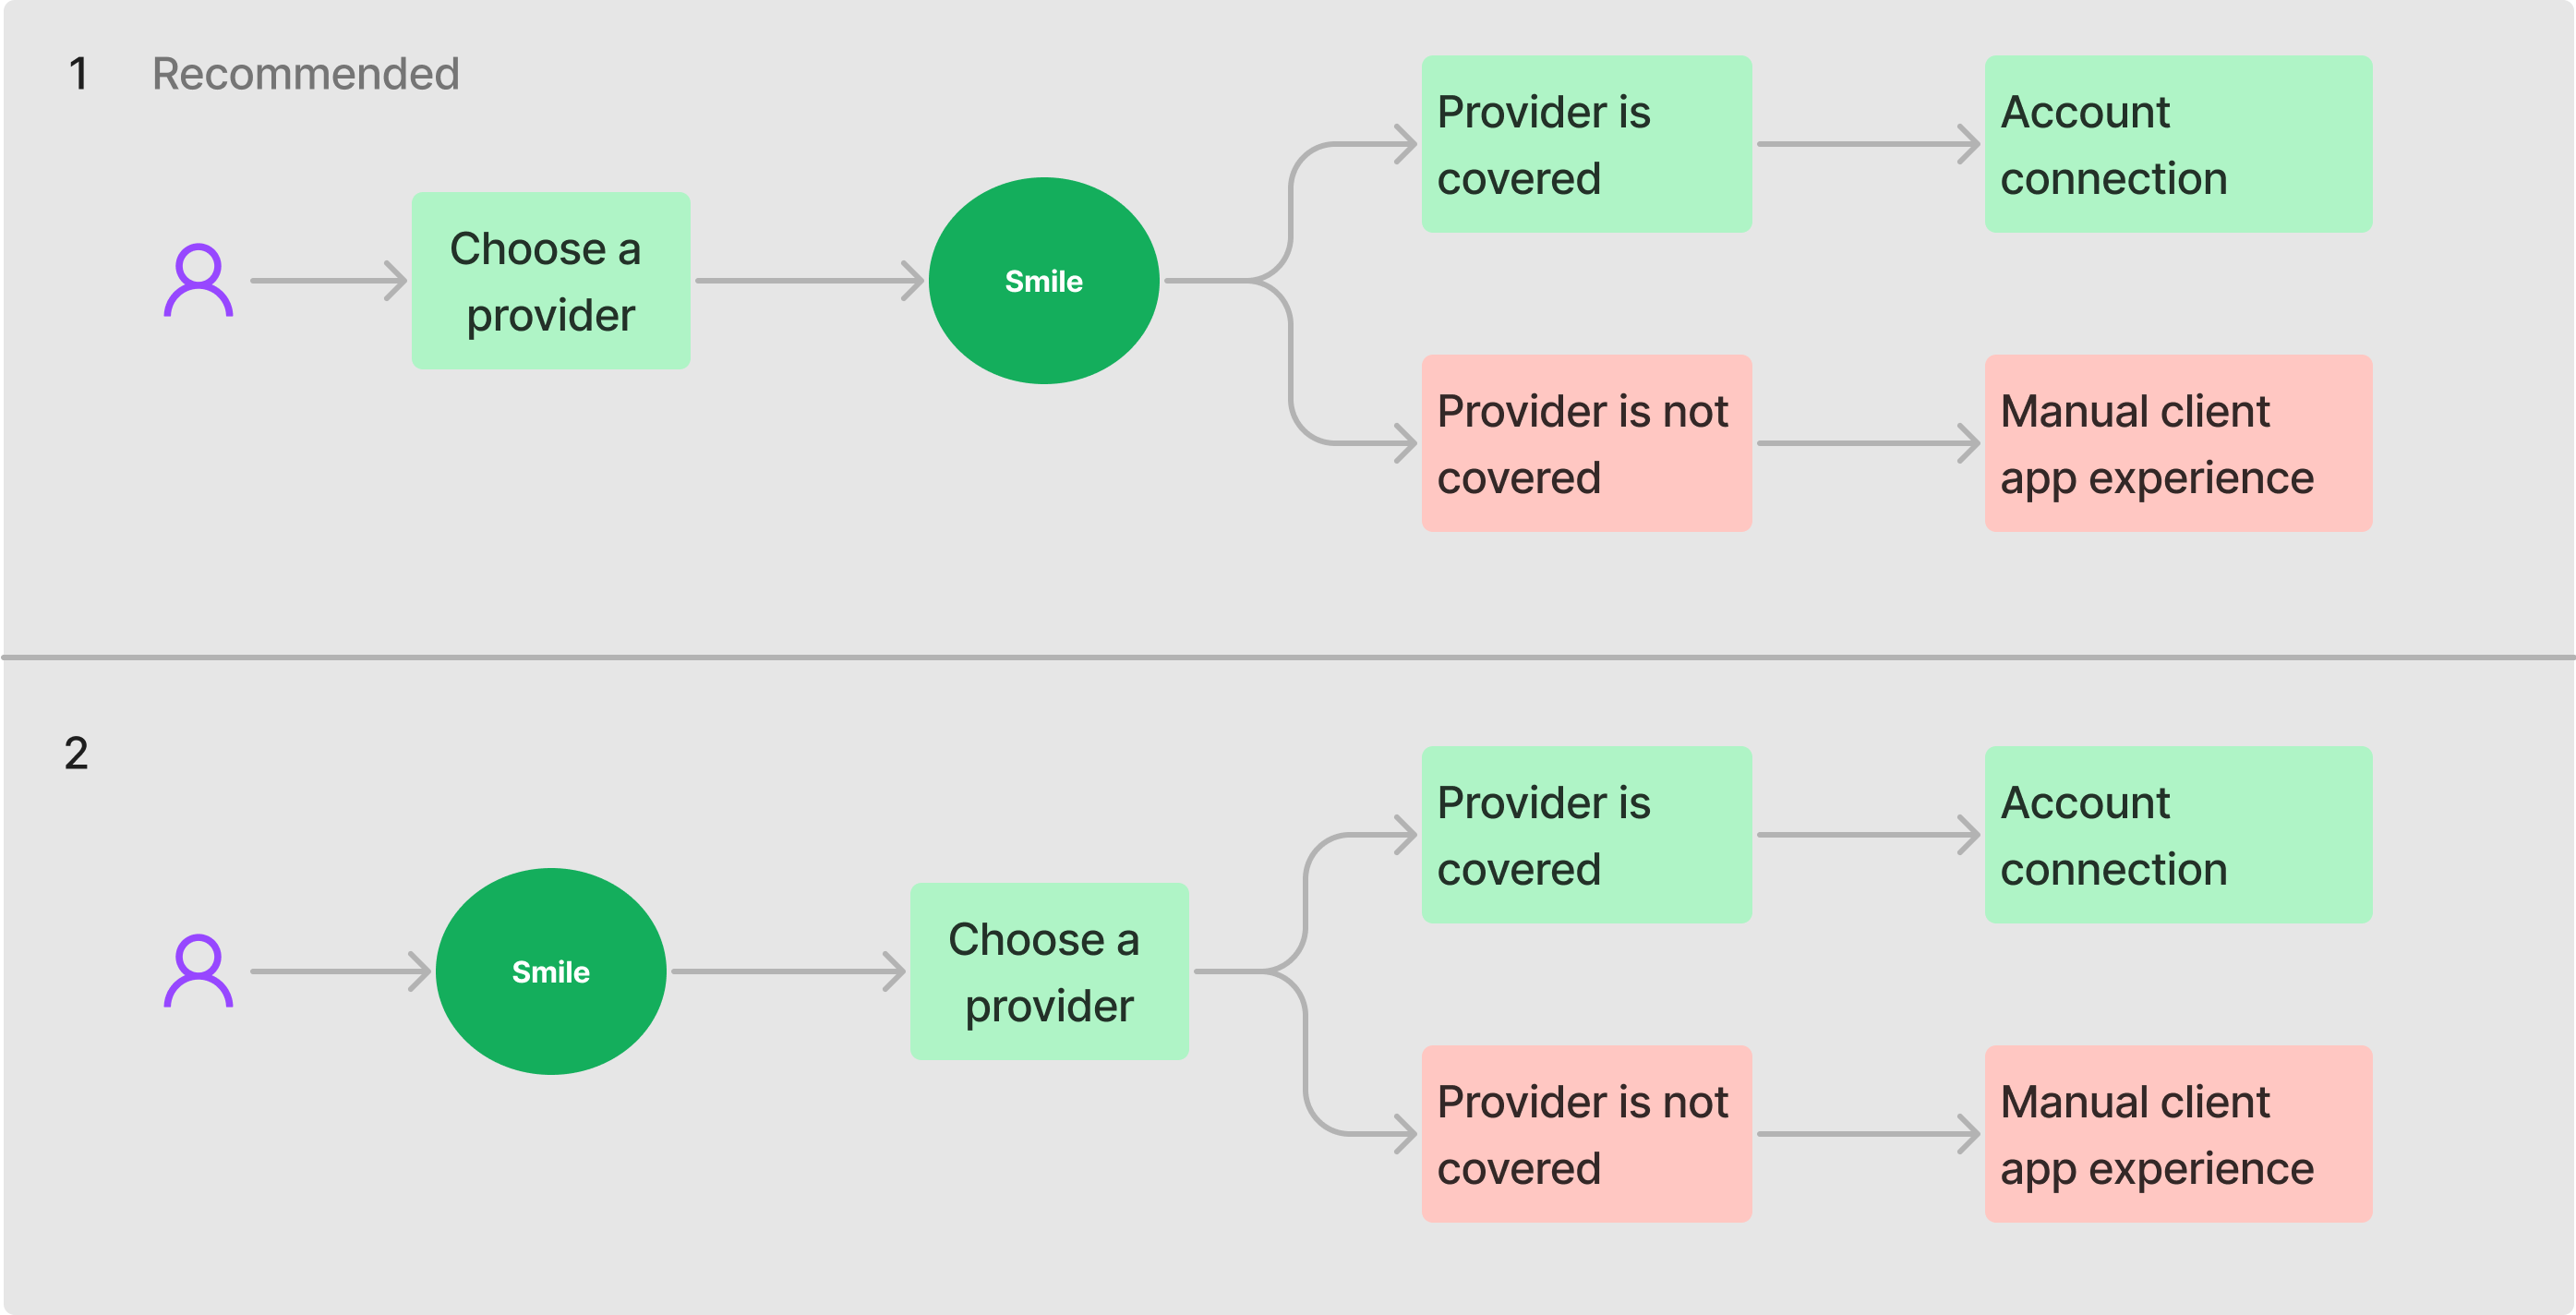
- Dedicated provider (recommended)
- Multiple providers
Dedicated provider
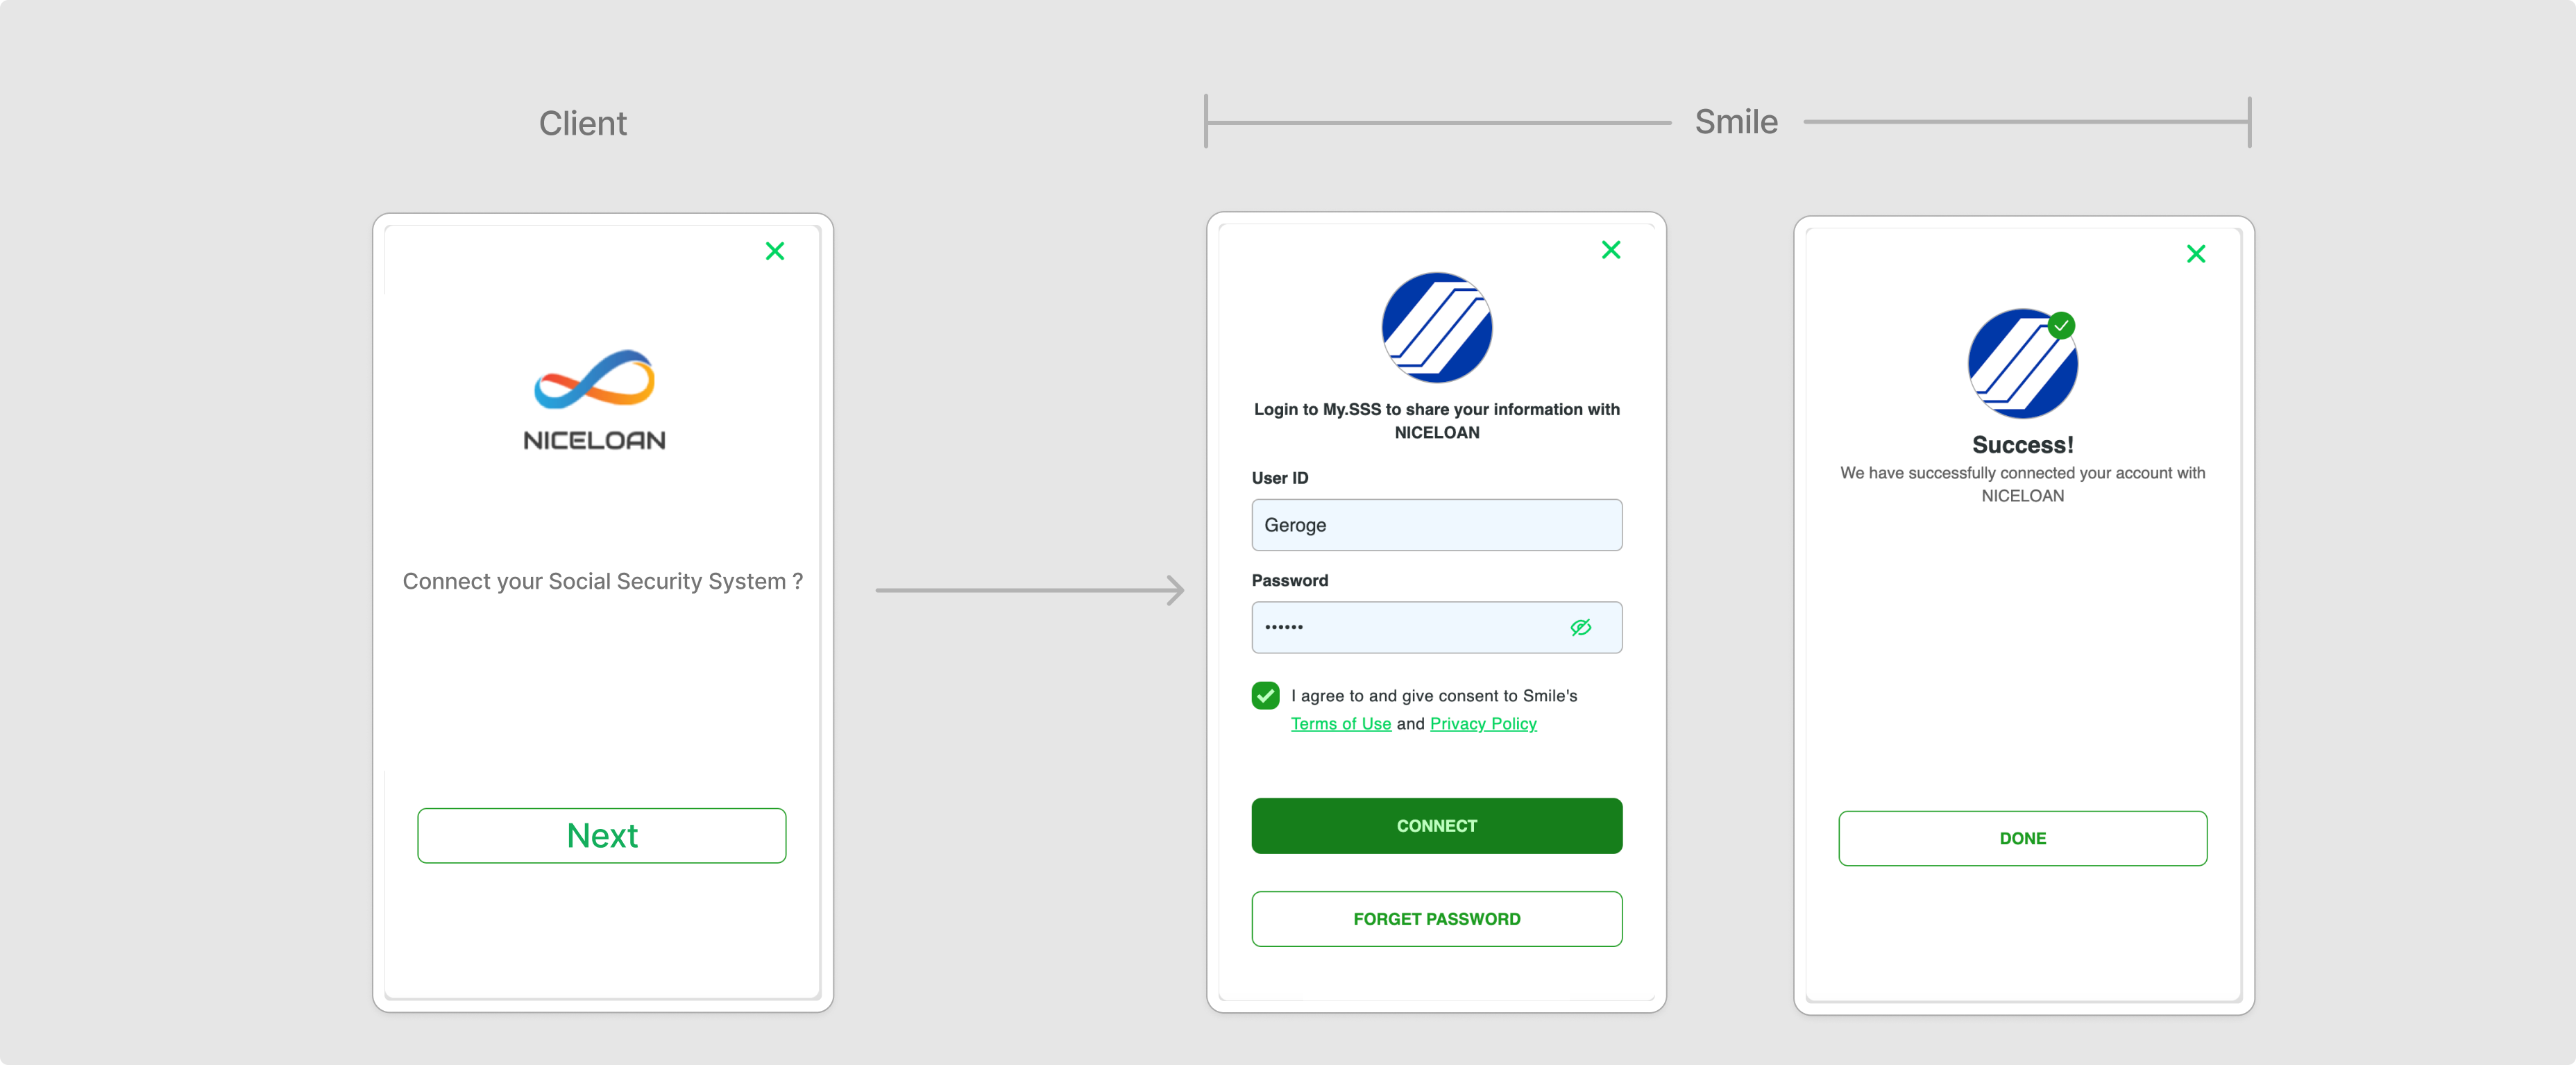
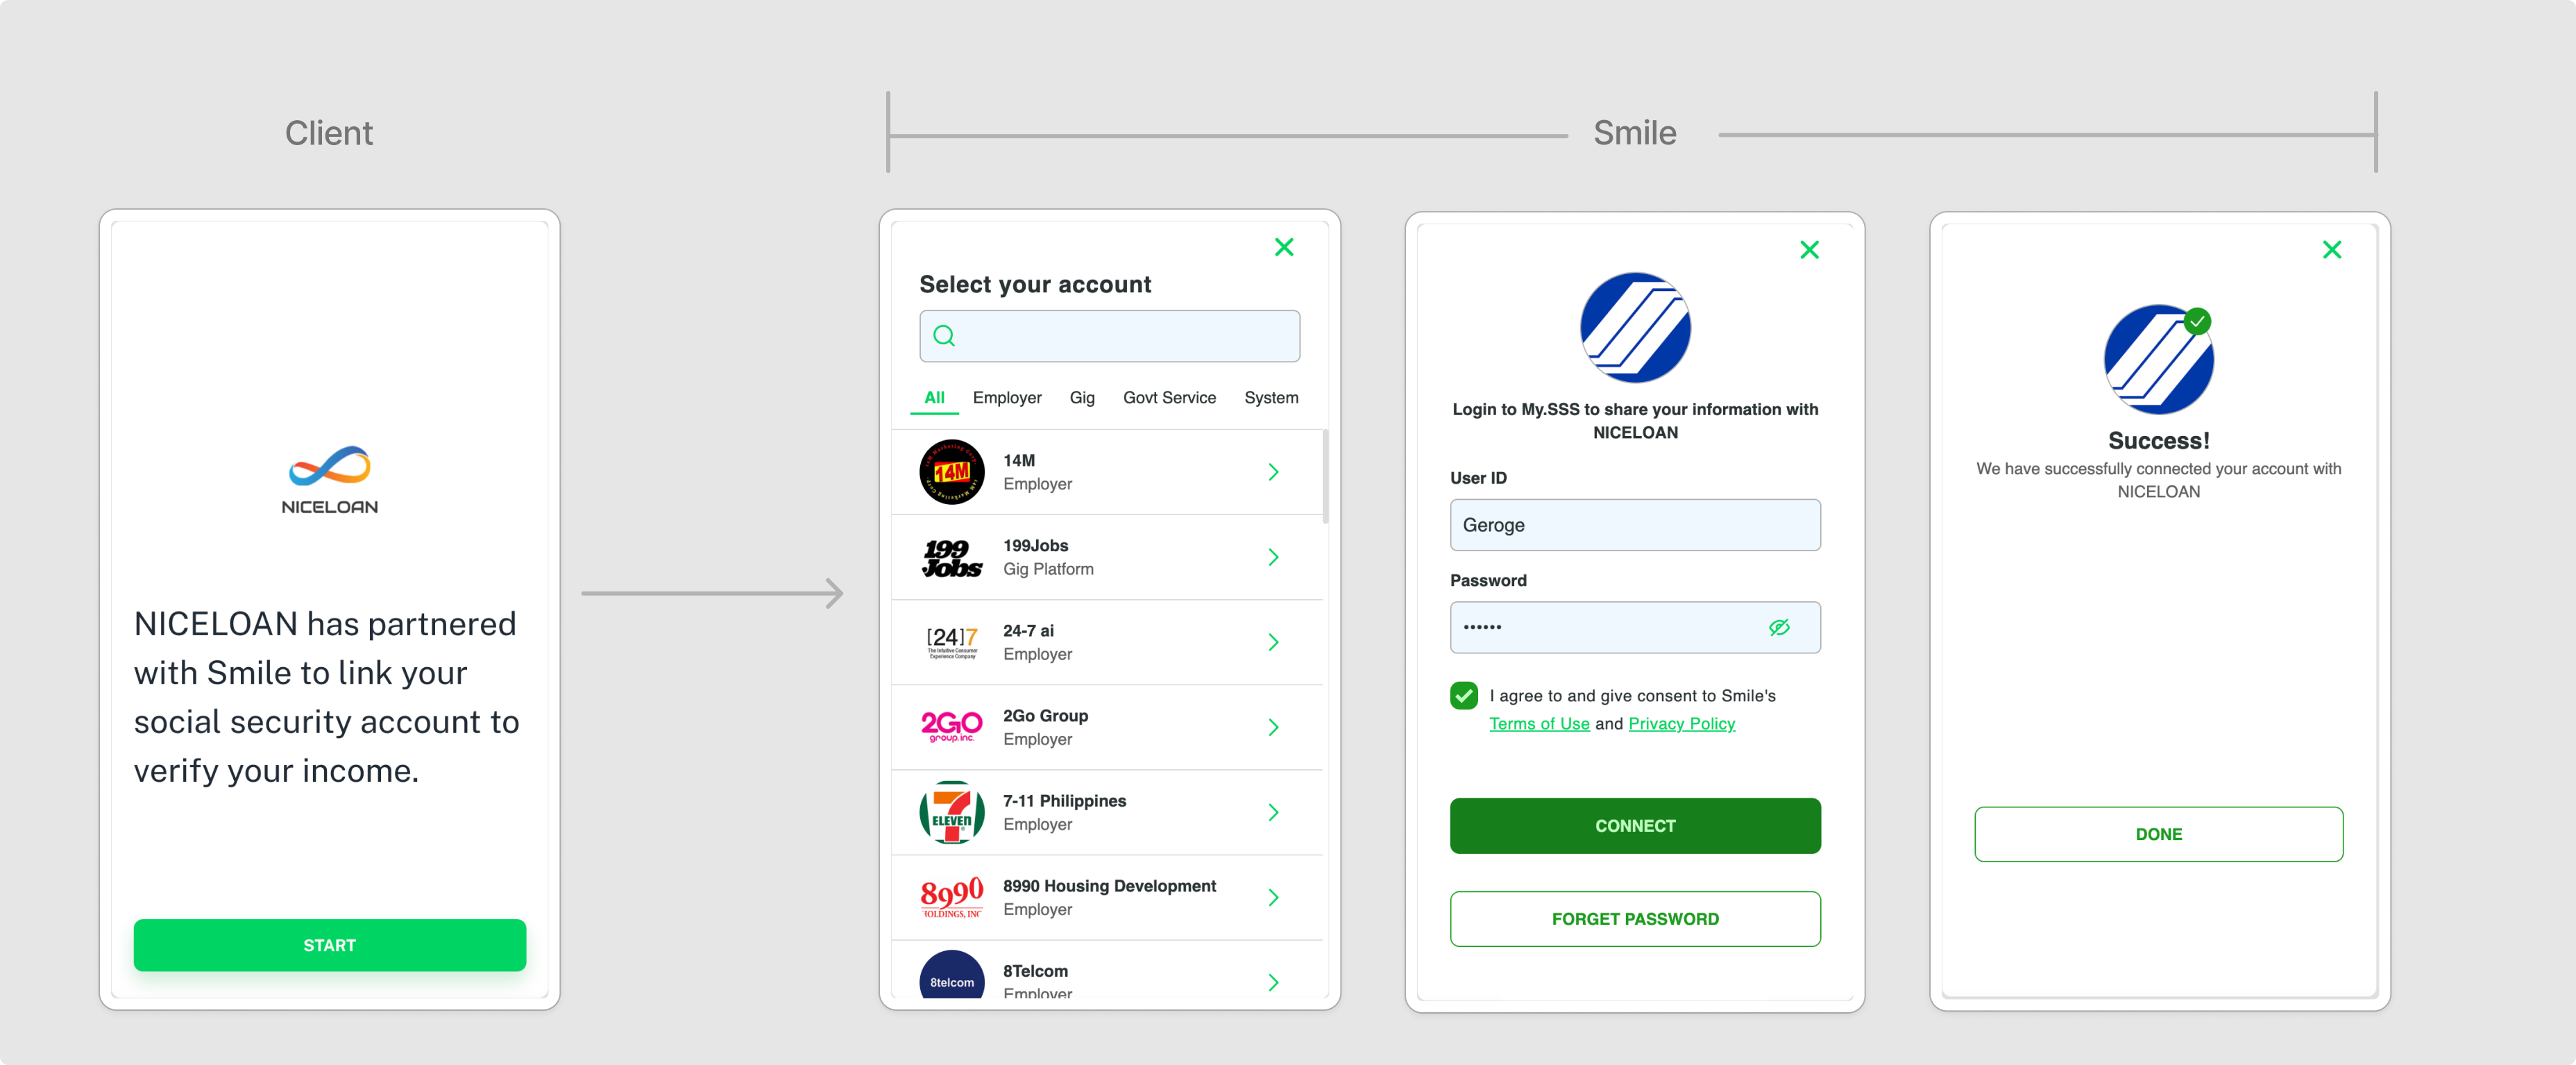
This option requires you to identify which data providers fit your user base. The user will be brought straight to the login screen (without the need to show the consent and provider list pages)
Multiple providers
This option sends users through a provider list on the SDK, where they can select from either all providers, or your shortlist of providers, and proceed to connect their accounts:
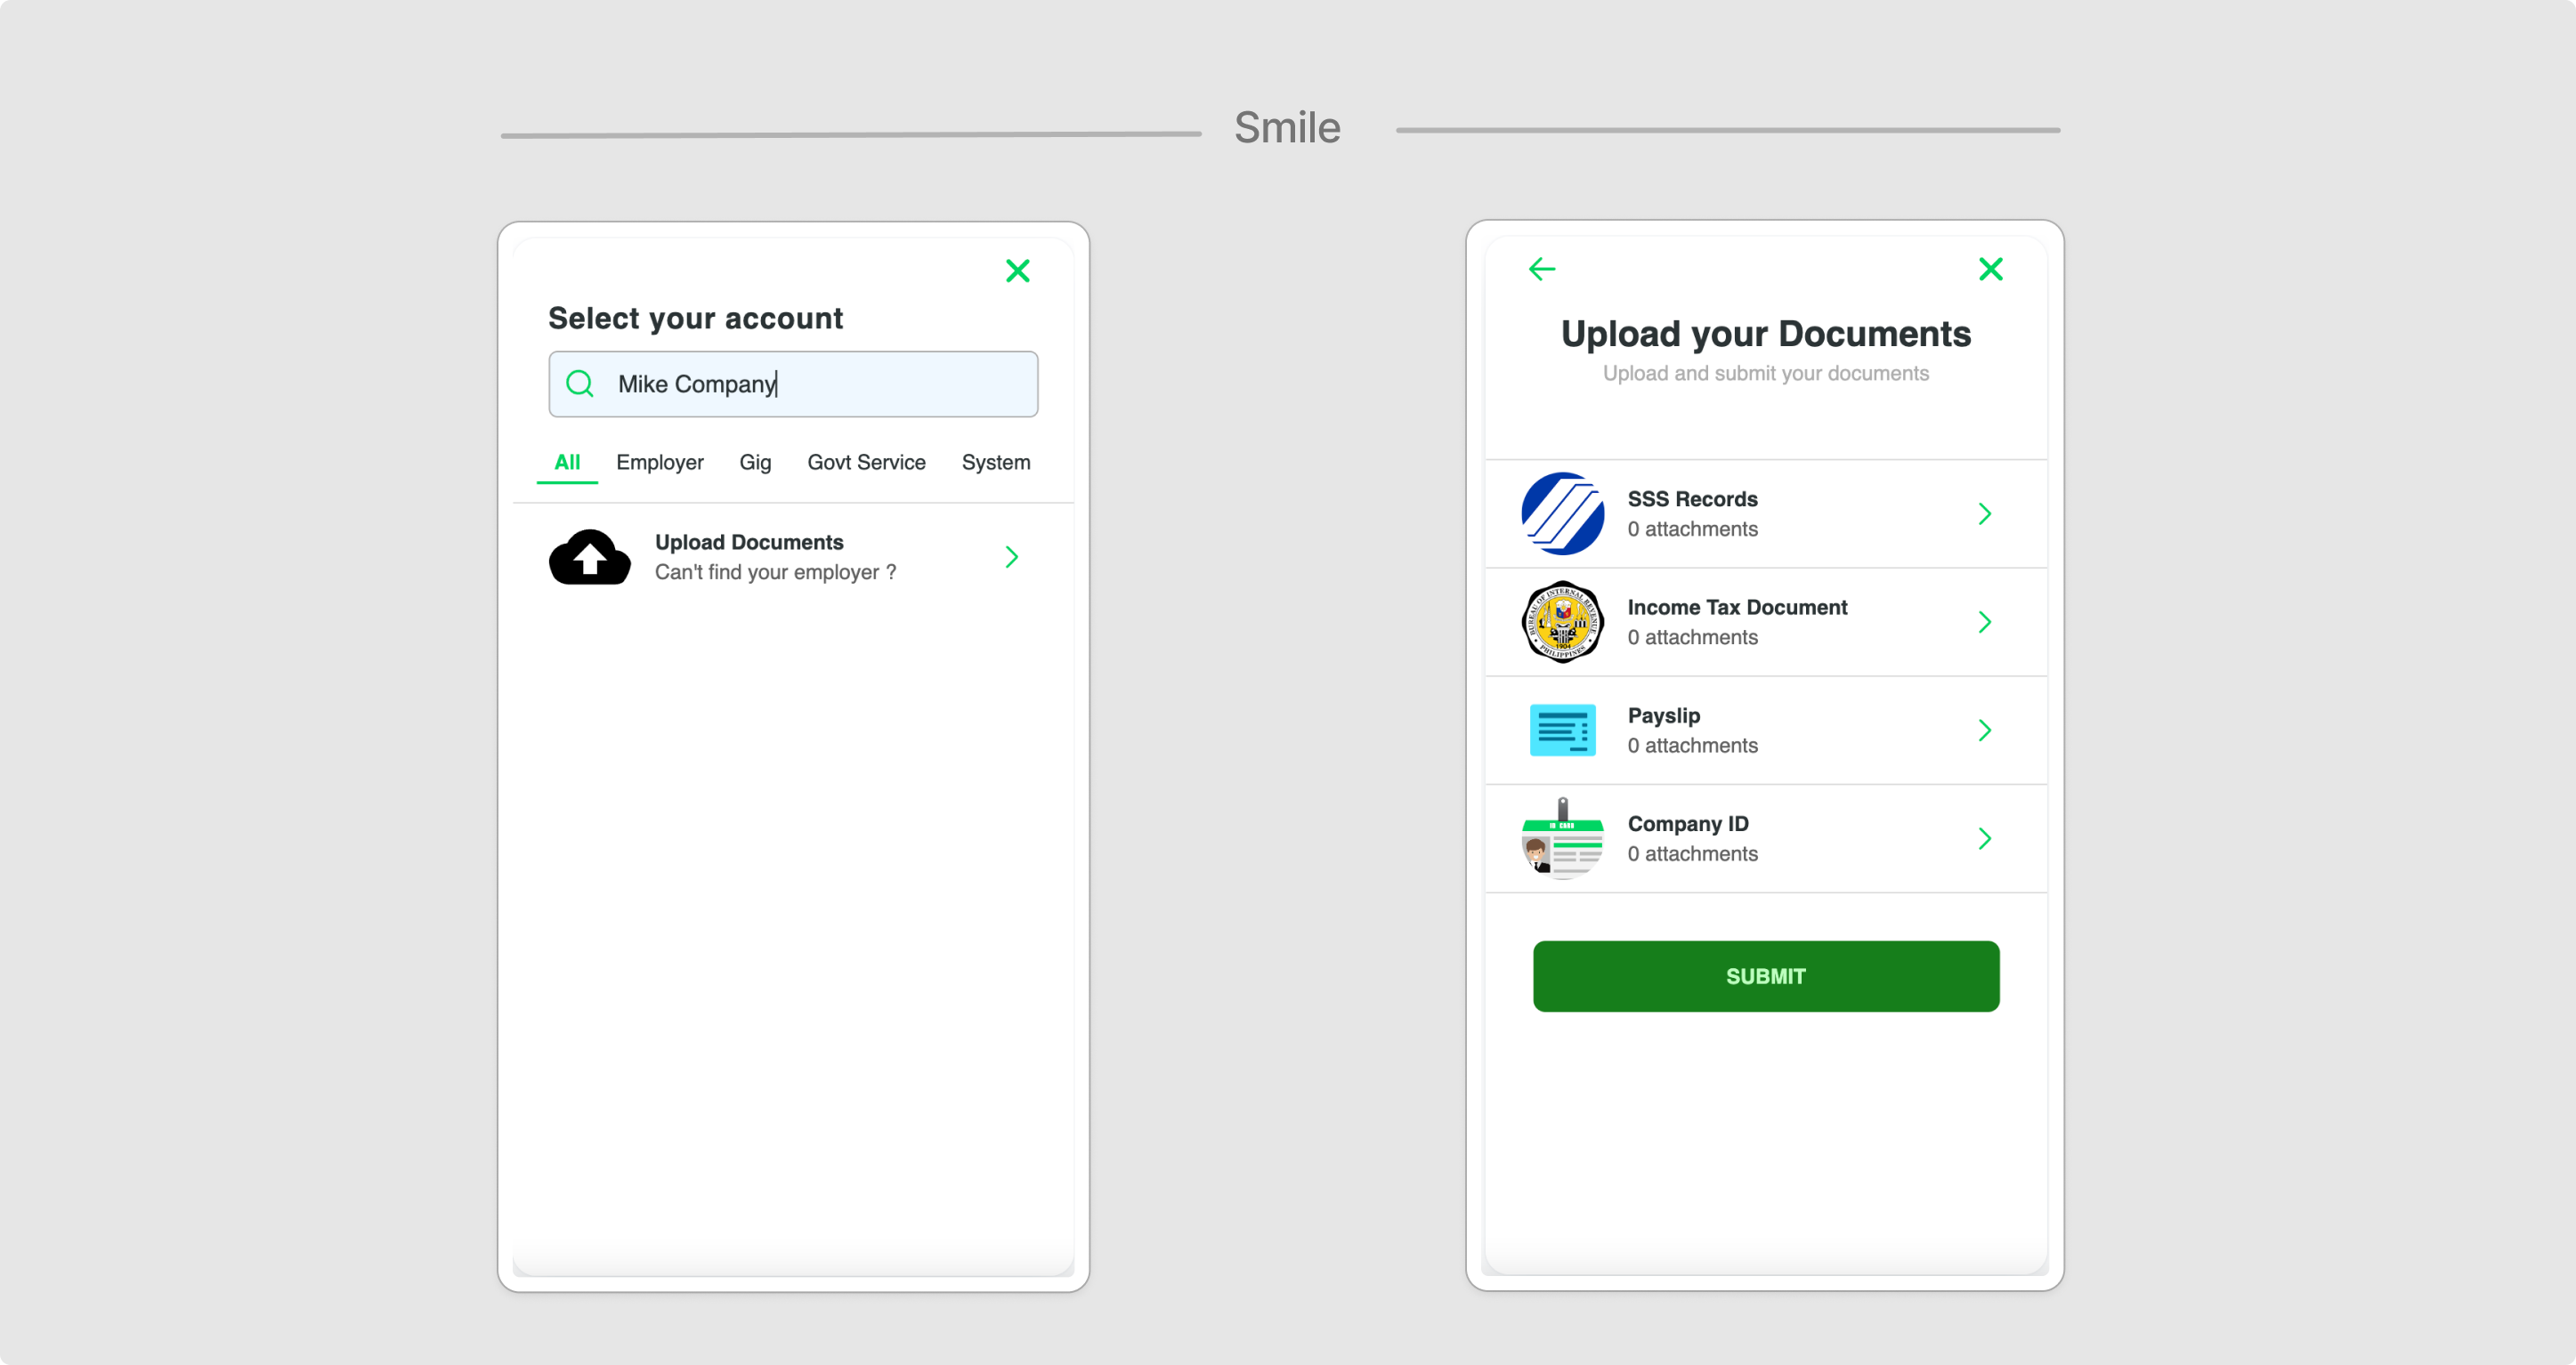
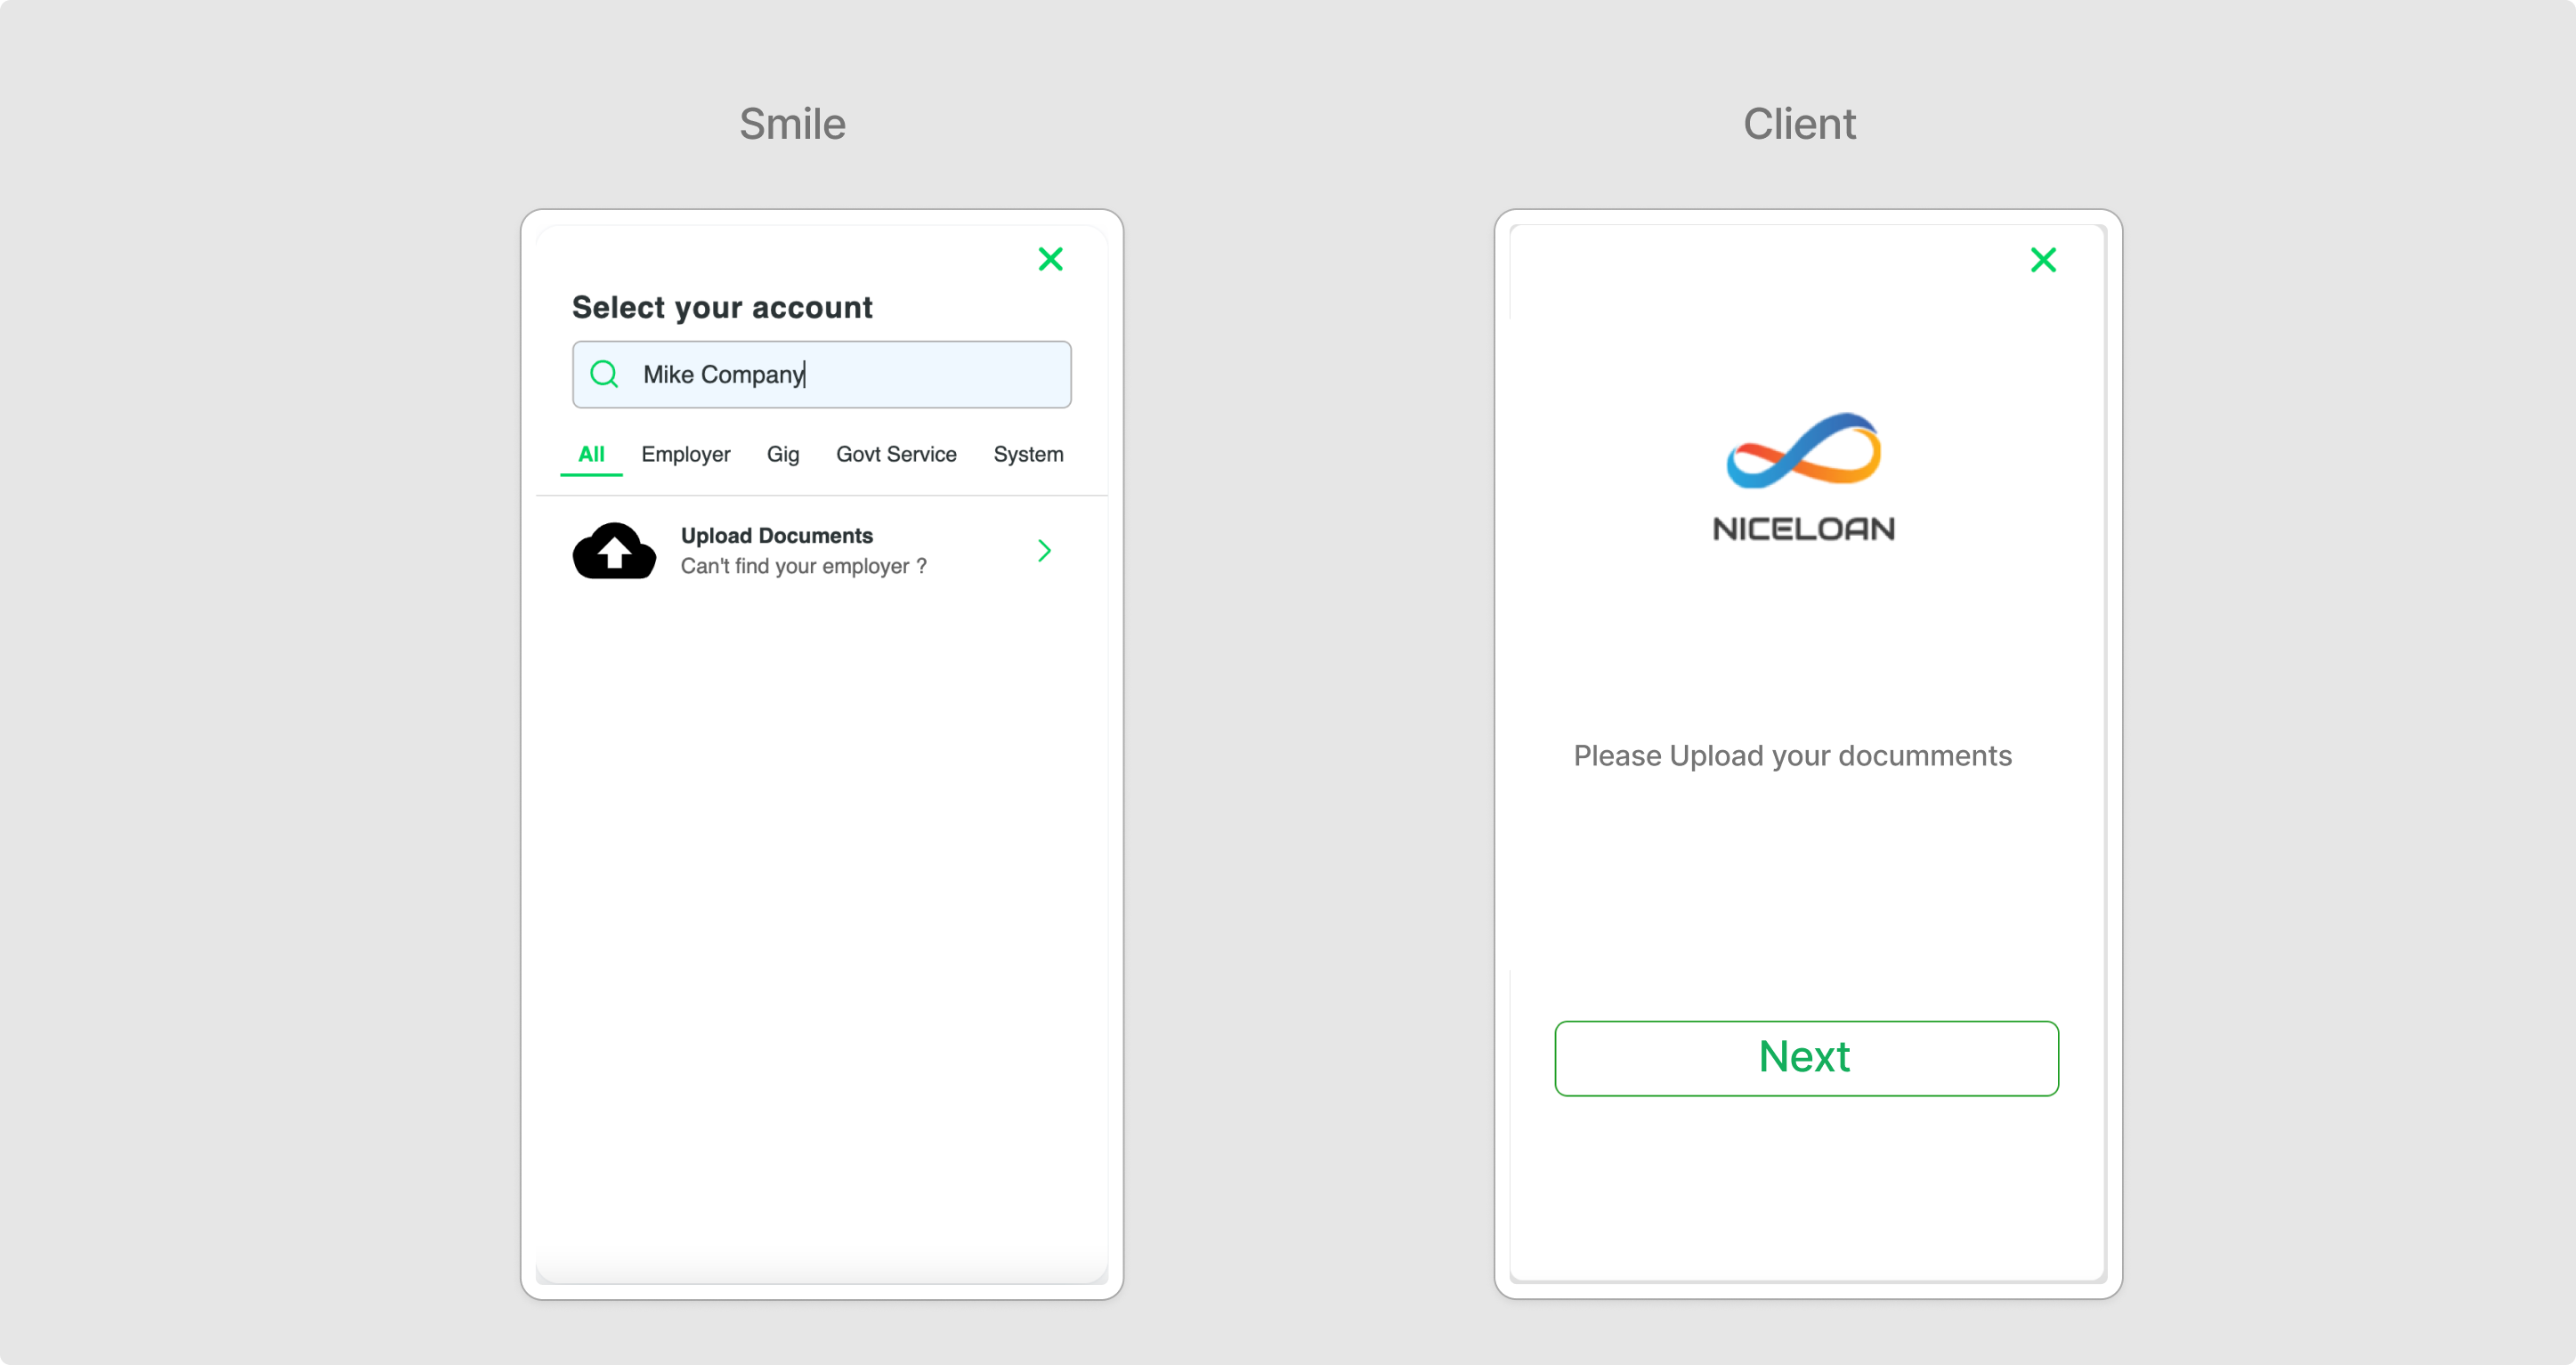
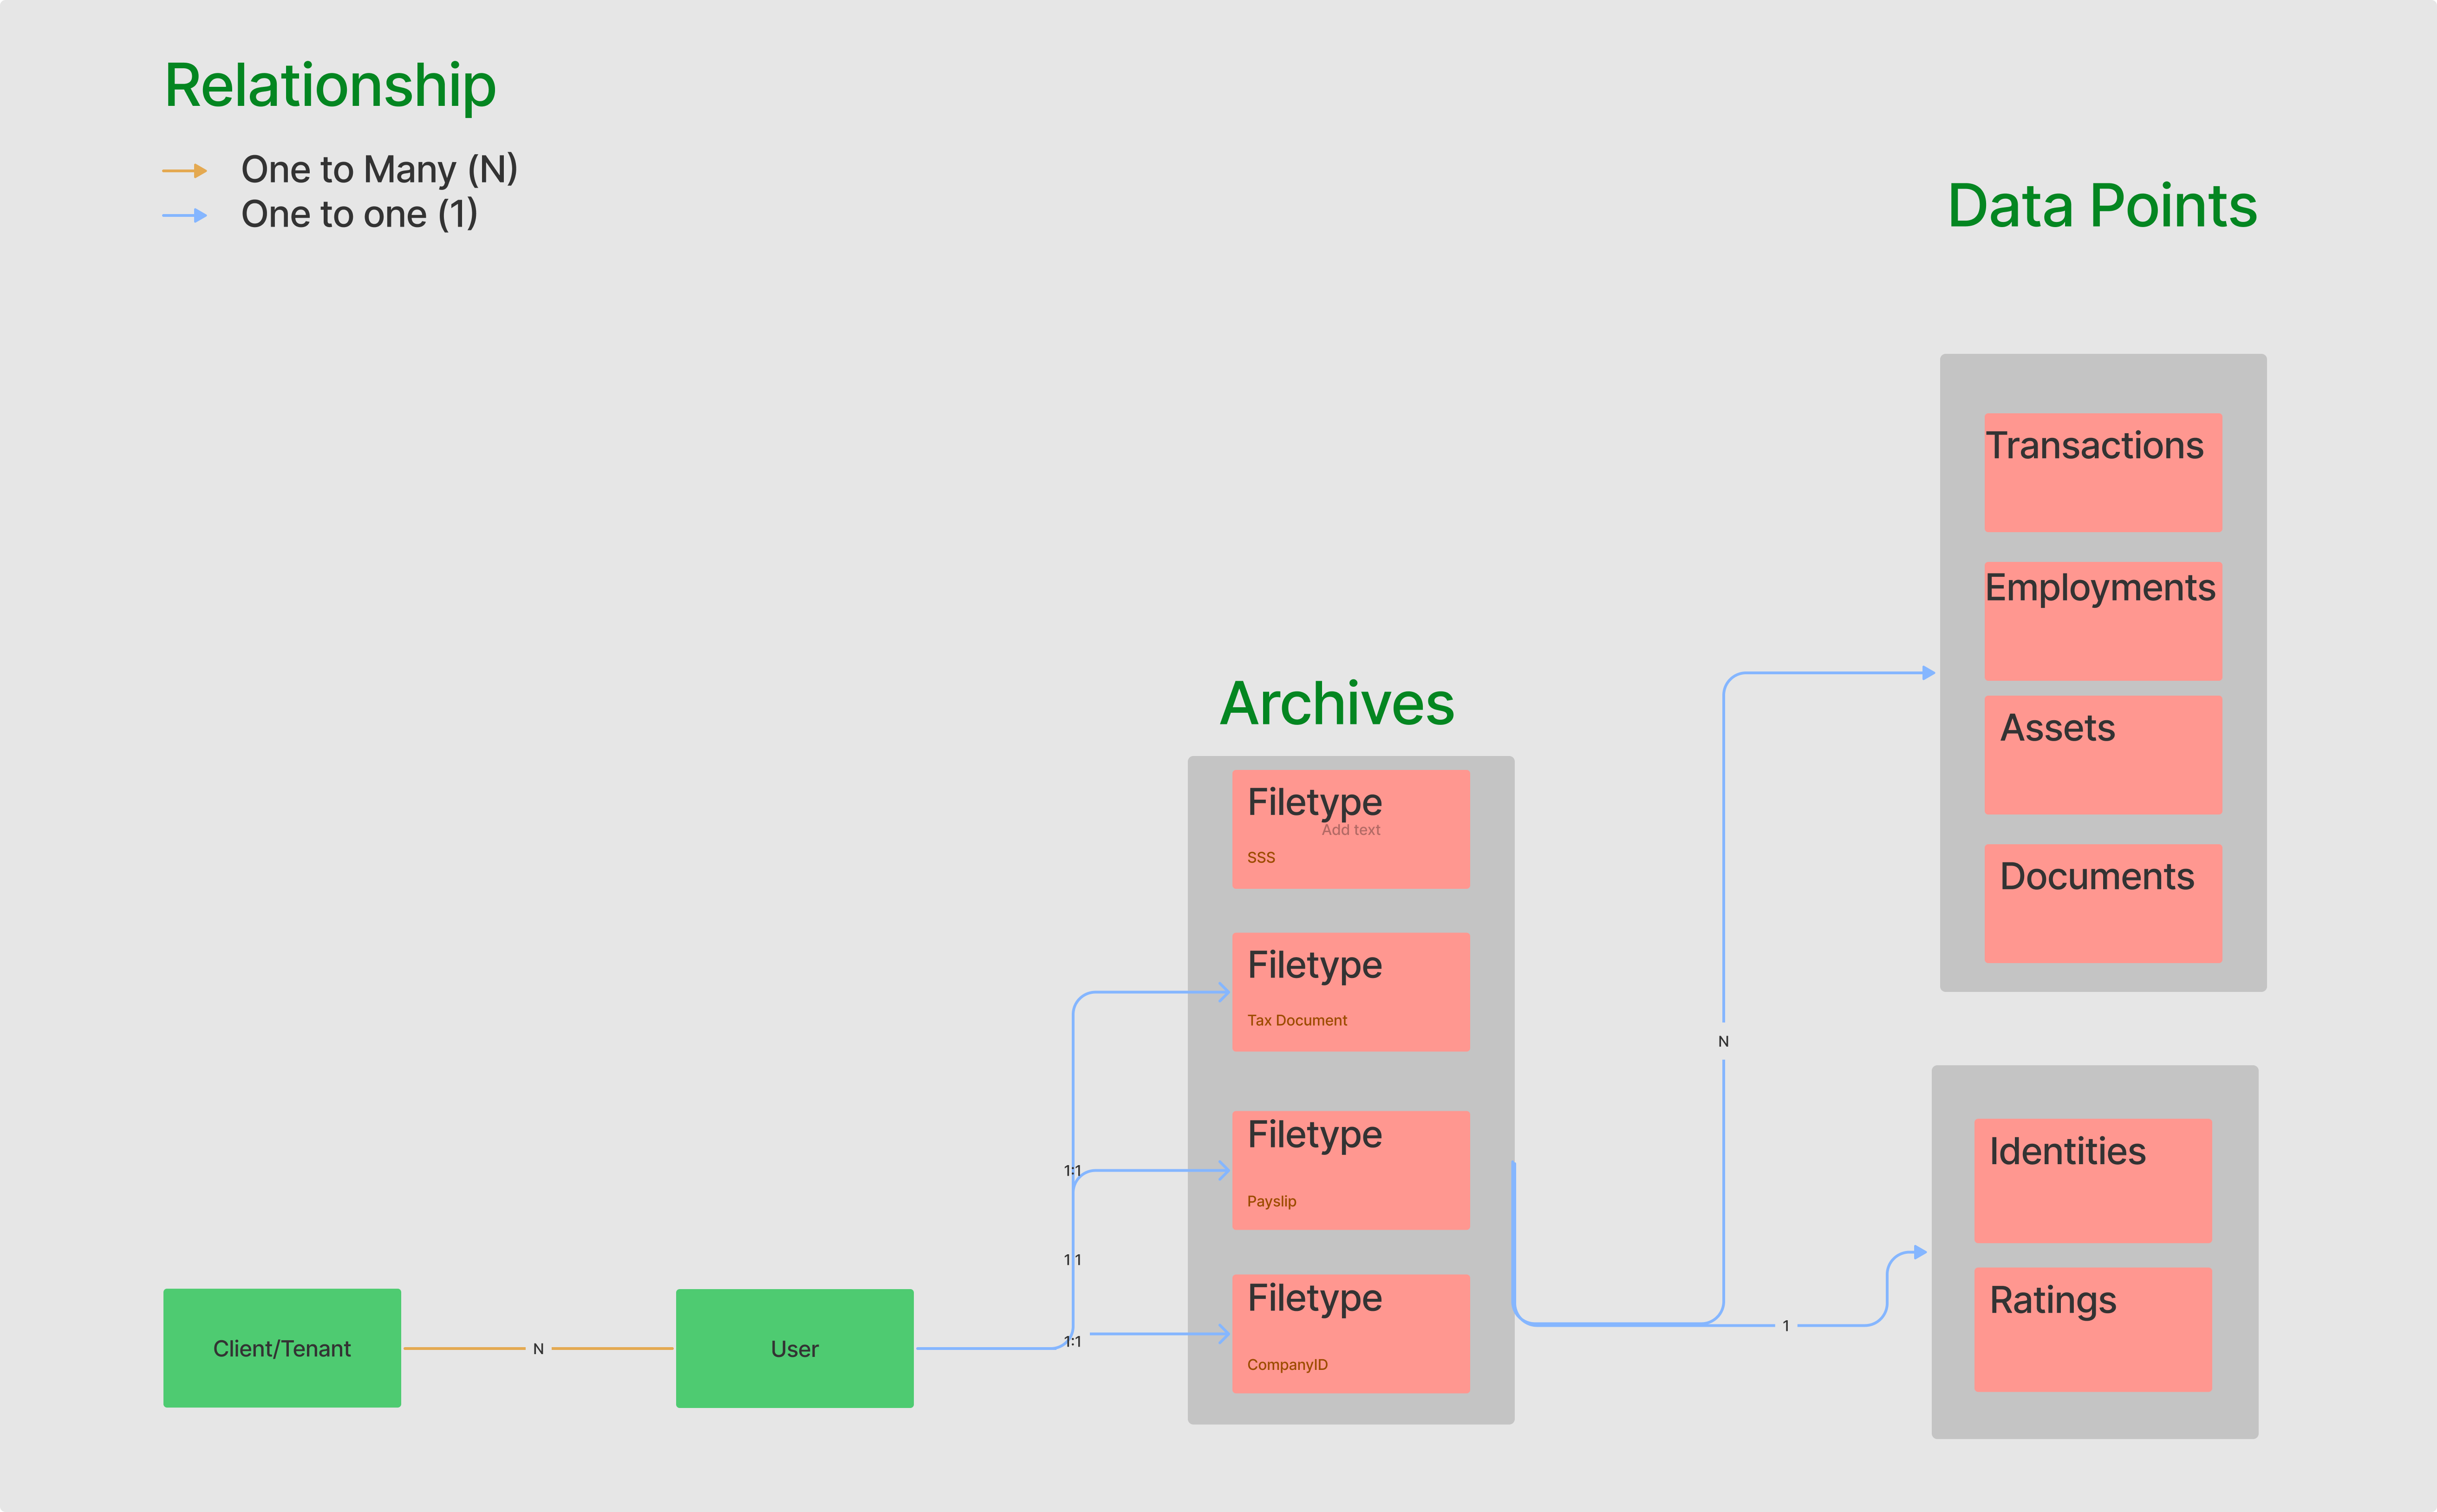
For users where Smile does not have coverage, the user will be shown a Can't find your employer? button. then, there are two possible scenarios for the user:
- If archive uploads are enabled, clicking this button will direct users to manually upload their documents, such as payslips, income tax records, etc.:
- Otherwise, clicking this button will close Smile Wink SDK and initiate a callback for you to funnel the user back to your application.
We advise sending all users through Smile as this provides the best user experience and the highest conversion rates.
How do you want to on-ramp users?
Now that you've determined 1) where in your flow and 2) to which users you want to surface Smile, it's important to frame Smile correctly for your users. Best-in-class implementations provide two things:
- Incentive - users need to clearly understand why they are verifying their income and employment, and the benefit this will give them. Making it clear that this will allow them to complete their application faster and get the best rates, is ideal.
- Context - provide users with context into the process they will go through. Users need to understand that they will 1) search for their providers, and 2) connect their employment or payroll account.
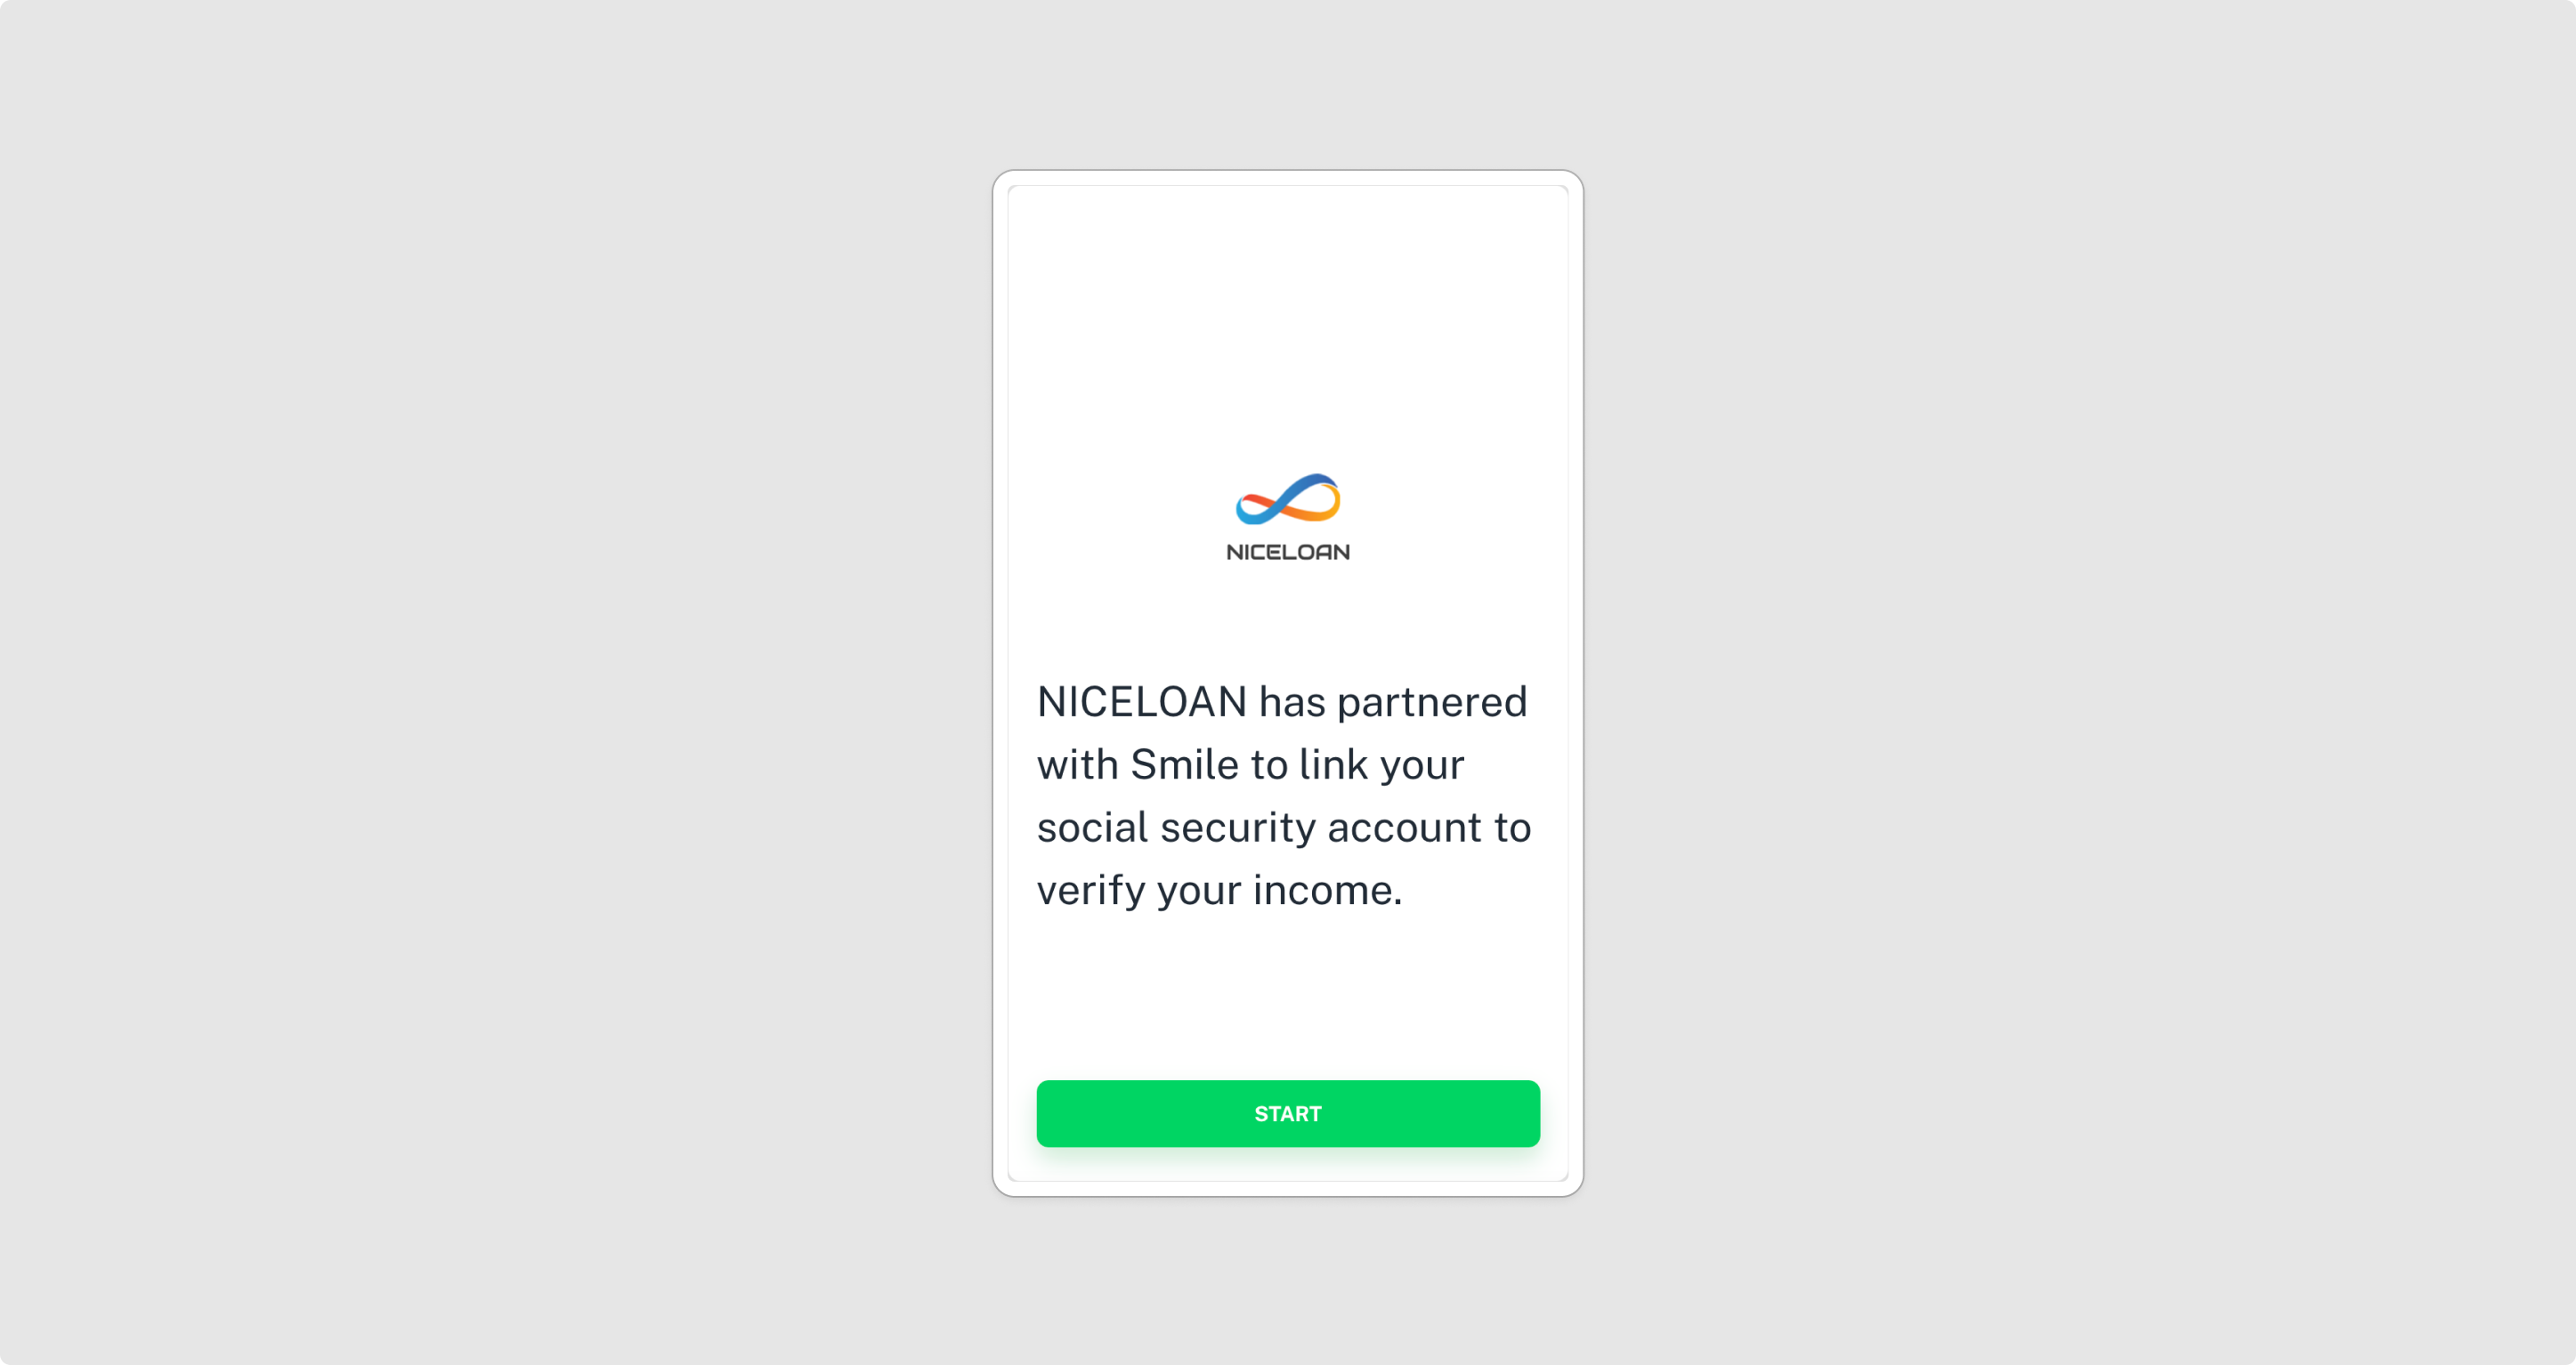
An example on-ramp screen is provided below.
How do you want to off-ramp users?
After a user connects their accounts and they are funneled back into your application, it is important to let the users know what will happen next in the process. This will depend on your overall flow and goals, but here are some examples:

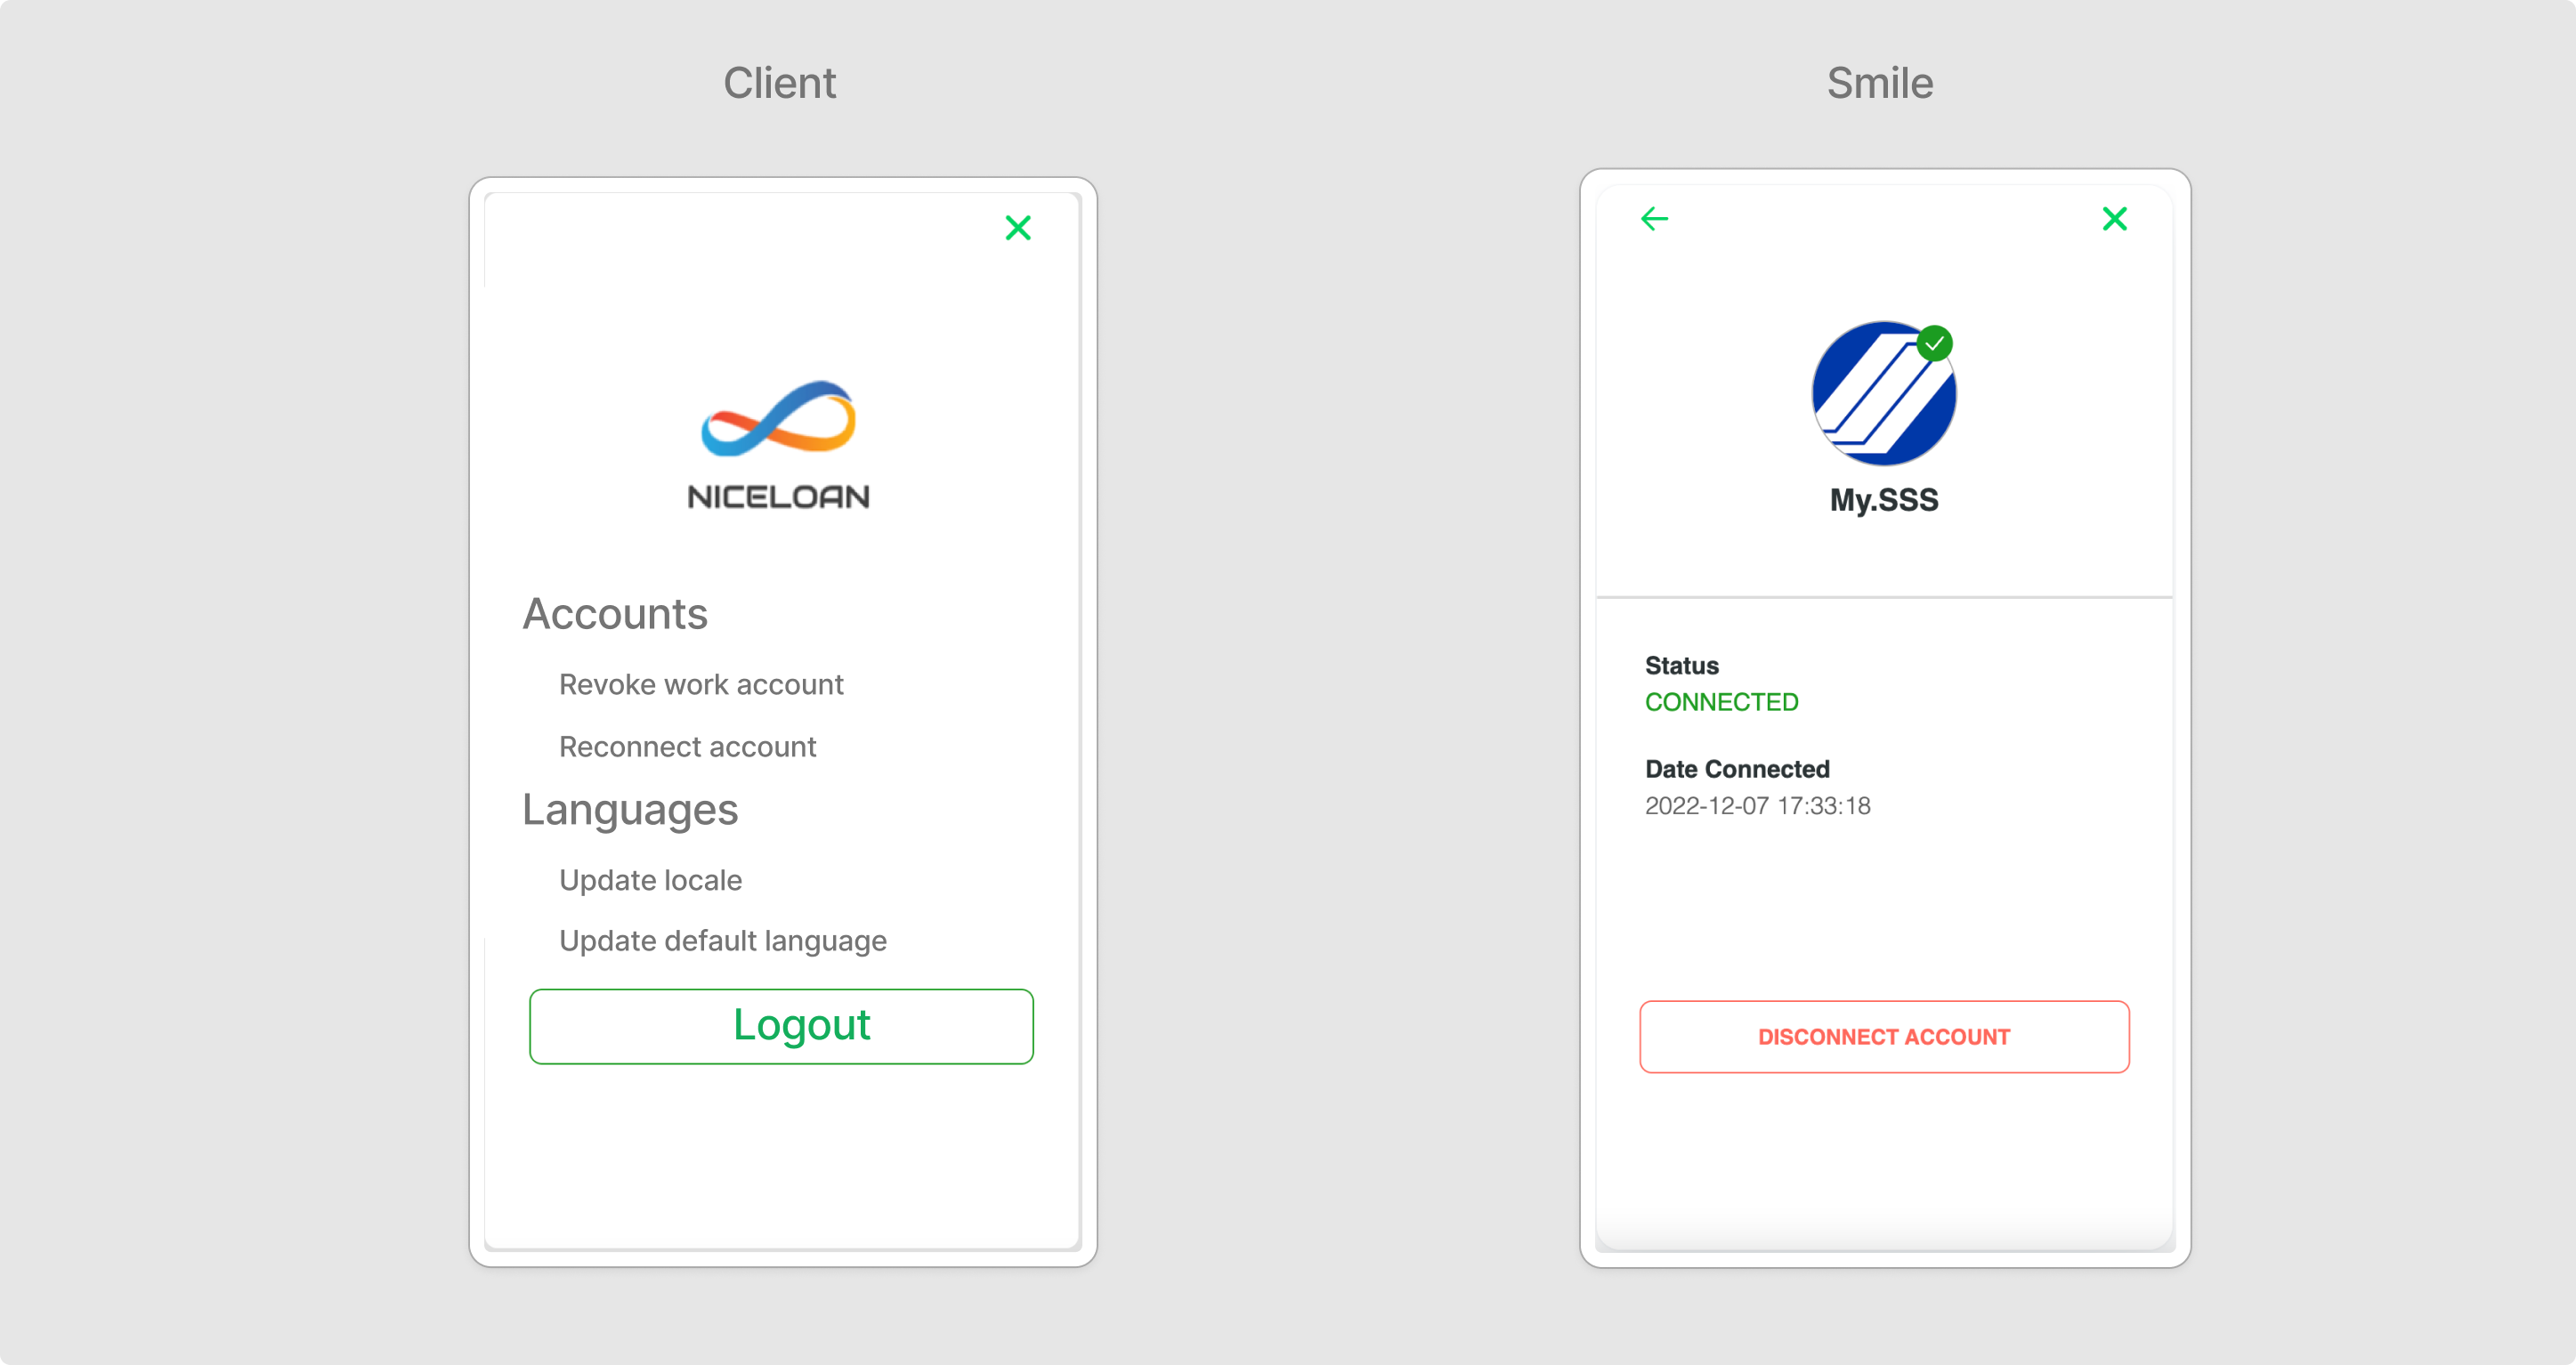
How can a user disconnect their account?
By default, Smile will have your users grant ongoing access to their employment accounts. You should provide users with an option to invoke Smile Wink SDK (for example, from an account settings page) so that they can revoke access.
Step 2: Design the required data
Smile has access to 140+ employment record data points. For verification, you most likely want to retrieve:
Identity:
- First name
- Last name
- Primary address
Employment:
- Employer name
- Job title
- Start date
- End date
Contribution:
- Amount
- Start date
- End date
Updated 28 days ago